Connecting an Outlet
Select the object containing the outlet you want to connect.
Choose Tools > Connections Inspector.
Drag from the outlet’s connection well to the target object.
Save your changes.
An outlet is an instance variable that points to another object, enabling two objects in an application to communicate with each other at runtime. You can use Interface Builder to fill in an outlet with the desired pointer. This process is called connecting an outlet. In most cases, you define outlet connections in Interface Builder and do not change those connections in your code. Before making the connection, you need to declare an outlet in the appropriate class and save your changes.
Open the nib file, select the object containing the outlet, and open the Connections inspector. The inspector lists possible connections to and from the object. The circles on the right are connection wells. Drag from the outlet’s connection well to the target object. (Interface Builder highlights the target object to indicate that a connection is possible.) The inspector visually indicates that the outlet connection is complete by filling in the connection well and listing the name of the target object.
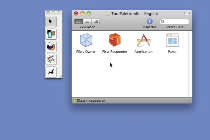
The video illustrates how to connect an outlet named toolButtons, declared in the controller object named File’s Owner, to the tool palette. The nib file is named ToolPalette.nib and belongs to the Sketch project.
Copyright © 2011 Apple Inc. All Rights Reserved. Terms of Use | Privacy Policy | Updated: 2011-03-08