 Table of Contents
  Previous Section
Forming Relationships in the Relationship Inspector
Creating a relationship with the Relationship Inspector is a more manual process than creating one in the diagram view. The inspector provides only the ability to configure a relationship that already exists. Consequently, unlike with the diagram view, you have to create a relationship before you can edit it with the Relationship Inspector.
- Select a source entity in the Model Editor, such as Movie.
- Choose Property
 Add Relationship.
- Select the new relationship in the Model Editor.
- Open the Relationship Inspector, either from the toolbar or by choosing Tools
 Inspector.
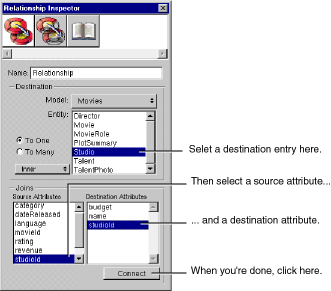
- In the Inspector, select the destination entity (Studio) in the Destination browser.
- Select the source attribute (studioId) in the Source Attributes browser.
- Select the destination attribute (studioId) in the Destination Attributes browser
- Make sure the relationship has the proper cardinality (in this example it should be set to To One since a movie has only one Studio).
- Click Connect.

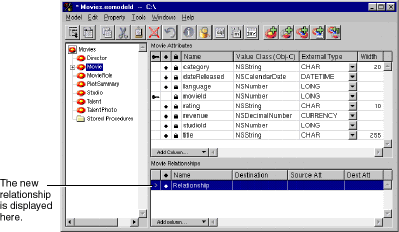
Figure 25. Adding a Relationship
Alternatively, you can click the  button in the toolbar. In either case, the text "Relationship" appears in the relationship table at the bottom of the window.

Figure 26. The Relationship Inspector
Typically, you form a relationship by connecting a primary key in one entity and a corresponding foreign key in another entity. In a to-one relationship, the source entity usually holds the foreign key, while the destination entity holds the primary key. The opposite is true for a to-many relationship. For example, studioId is a foreign key for Movie, while it's the primary key for Studio.
EOModeler assigns the relationship a default name; in this example it's "studio." You can edit this name if desired using either the Inspector or the table view.
 Table of Contents
  Next Section