Retired Document
Important: This document may not represent best practices for current development. Links to downloads and other resources may no longer be valid.
Including a custom NSWindow in a nib file
Q: How can I create a custom window in Interface Builder?
A: Create a subclass of NSWindow. Drag the header file for this class into a nib file in Interface Builder. You can now change the class of any window in that nib file by merely selecting it and then changing its "Custom Class" in the Inspector.
How it Works: When the nib file is loaded, this window's isa pointer will be set to refer to the custom class rather than the usual NSWindow. All method lookup will now be done beginning with this custom class.
To further illustrate by means of an example, you could create a custom window in your MainMenu.nib file by using the following three steps.
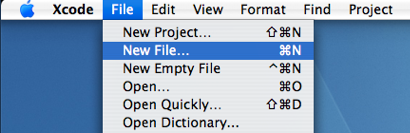
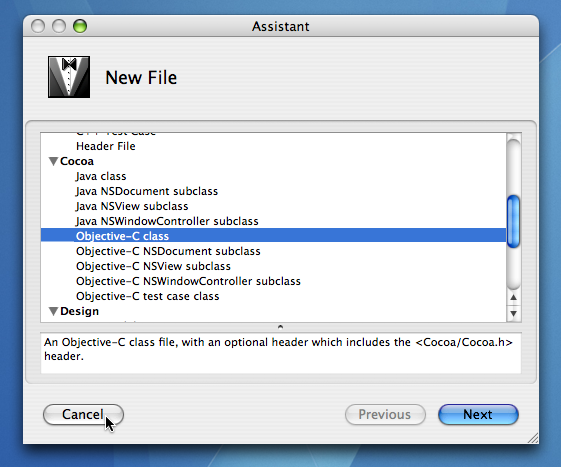
Step 1: First, in Xcode, create a custom subclass of NSWindow . Let's assume the class name is "XYZWindow". Figures 1 & 2 show how to specifiy creating an Objective-C class. Name the .m file "XYZWindow.m" and ensure the box is checked to also create "XYZWindow.h"
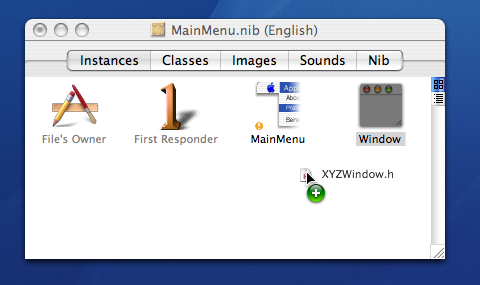
Step 2: Drag the headerfile, XYZWindow.h, you just created in Xcode into the MainMenu.nib file in Interface Builder as shown in Figure 3. As an alternative to using drag and drop, you could select "Read Files ..." from the "Classes" menu in Interface Builder and explicitly choose "XYZWindow.h".
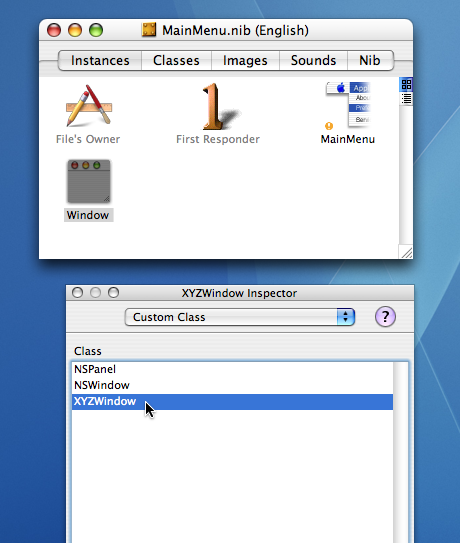
Step 3: Select the Window in the MainMenu.nib, choose "Show Inspector" and select "Custom Class" from the popup button. Change the class from NSWindow to "XYZWindow" by simply selecting it in the list.
Document Revision History
| Date | Notes |
|---|---|
| 2007-03-21 | New document that shows how to create a custom NSWindow and instantiate it in a nib file. |
Copyright © 2007 Apple Inc. All Rights Reserved. Terms of Use | Privacy Policy | Updated: 2007-03-21