Adding Interactive Control to Visual Effects
Use visual effects in combination with mouse and touch events to create interactive web applications that work equally well on the desktop and on iOS-based devices—applications that enable the users to manipulate objects on the screen with the mouse or with their fingers.
Using a Click or Tap to Trigger a Transition Effect
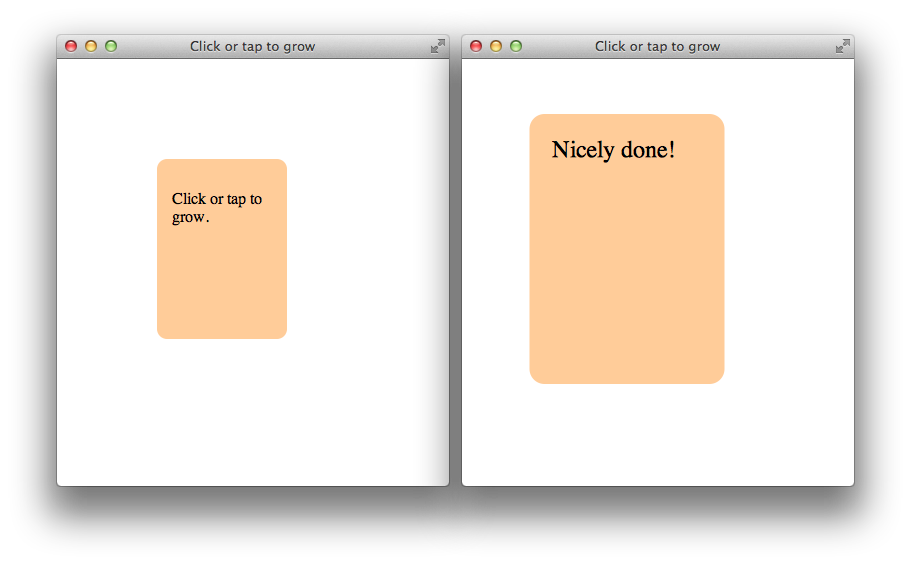
In this first example, the user can click an element using the mouse or tap an element using a finger to change the element’s size. The change in size is a 2D CSS transform animated using a CSS transition. A finger tap triggers an onclick event in Safari on iOS, so an event handler for onclick events is all you need to handle both tap and click events.
First, the example in Listing 8-1 defines an class of element to manipulate and sets the properties needed to animate the transition using CSS. Next, the example defines a simple JavaScript function to change the element’s size using a CSS transform. Finally, the example installs the function as an event handler for onclick events on the element. Figure 8-1 shows the results.
Listing 8-1 Simple touch or tap handler
<html> |
<head> |
<title>Click or tap to grow</title> |
<style> |
#growBox { position: absolute; top: 100; left: 100; height: 150; width: 100; |
background-color: #ffcc99; padding: 15; border-radius: 10; |
/* animate transforms over 1.5 seconds */ |
-webkit-transition: -webkit-transform 1.5s; |
} |
</style> |
<script type="text/javascript"> |
function grow() { |
document.getElementById("growBox").style.webkitTransform = "scale(1.5)"; |
document.getElementById("growBox").innerText="Nicely done!"; |
} |
</script> |
</head> |
<body> |
<div id="growBox" onclick="grow();"> |
<p id="growText">Click or tap to grow.</p> |
</div> |
</body> |
</html> |
Controlling a 3D Transform with a Click, Touch, or Swipe
In the next example, the user can flip a virtual page forward or backward with a click, a tap, or a swipe. Two div elements are styled to look like pages and are positioned back to back, and the example uses a 3D transform to create an animation that looks like the page of a book turning.
Any click, tap, or swipe on the page causes the page to turn, so in this case the direction of the swipe doesn’t matter. Both a single tap and a swipe gesture trigger a touchend event when they complete, so the example installs an event listener for the touchend event to handle taps and swipes as well as a listener for the click event.
The example uses CSS to define the body element as a 3D container with perspective and to define a page class, with front and back subclasses. To make the page flip animation look like the page of a book turning, the div elements pivot on an edge, instead of around the middle. Consequently, the pages are positioned side by side, so that they lie on top of each other when one is frontside-up and the other is backside-up, flipped 180 degrees around its edge.
JavaScript functions flip the pages back and forth by applying 3D transforms. An onload function installs the page flipping functions as event listeners, with a different flip direction installed for the front and back subclasses. An additional listener function is installed for touchmove events to prevent a swipe from scrolling the browser window, which is the default behavior in Safari on iOS.
There is a complication in using the touchend event to detect a tap while at the same time using the click event to detect a mouse click: a tap generates both a touchend event and a click event. To prevent the page flip from being called twice by a tap, an event listener is installed for the touchstart event. If a touchstart event occurs, the user is using a finger, not a mouse, so the listener functions for the click event are removed. Because the click event listeners need to be removed only once, the touchstart event listener removes itself as well.
The example uses HTML to create div elements of the page front and page back classes, to hold the page content, and to call the JavaScript function that installs the event listeners on page load. The complete example is in Listing 8-2 and is illustrated in Figure 8-2.

Listing 8-2 Page flip on click, tap, or swipe
<html> |
<head> |
<title>Page turner</title> |
<style> |
/* Set 3D perspective */ |
body { -webkit-transform-style: preserve-3d; |
-webkit-perspective: 800px; |
text-align: center; |
} |
/* Define a page */ |
.page { position: absolute; top: 50; height: 200; width: 150; padding: 25; |
background-color: #ffcc99; padding: 15; |
border-radius: 10; border: 1px solid tan; |
/* Animate transforms over 1.5 seconds */ |
-webkit-transition: -webkit-transform 1.5s; |
/* Hide pages when flipped over */ |
-webkit-backface-visibility: hidden; |
} |
/* Front page pivots on left edge, is on right of screen when face up */ |
.front { left: 225; -webkit-transform-origin: 0px 0px;} |
/* Back page pivots on right edge, is on left of screen when face up */ |
.back { left: 50; -webkit-transform-origin: 100% 50%; |
/* back of page starts flipped over */ |
-webkit-transform: rotateY(180deg); |
} |
</style> |
<script type="text/javascript"> |
// Flip page front-to-back |
function flip() { |
document.getElementById("frontPage").style.webkitTransform = "rotateY(-180deg)"; |
document.getElementById("backPage").style.webkitTransform="rotateY(0deg)"; |
} |
// Flop page back to front |
function flop() { |
document.getElementById("frontPage").style.webkitTransform = "rotateY(0deg)"; |
document.getElementById("backPage").style.webkitTransform="rotateY(180deg)"; |
} |
// Initialize event handlers on page load |
function init() { |
// Click event marks a mouse click |
document.getElementById("frontPage").addEventListener("click", flip, false); |
document.getElementById("backPage").addEventListener("click", flop, false); |
// Touchend event marks end of tap or swipe |
document.getElementById("frontPage").addEventListener("touchend", flip, false); |
document.getElementById("backPage").addEventListener("touchend", flop, false); |
// Touchstart event means we can remove click event listeners |
document.body.addEventListener("touchstart", noClicks, false); |
// Allow user to swipe without scrolling the page |
document.body.addEventListener("touchmove", noScroll, false); |
} |
// Prevent a swipe from scrolling the browser page |
function noScroll(e) { |
event.preventDefault(); |
} |
// If we're getting touch events, remove click handlers |
function noClicks(e) { |
document.getElementById("frontPage").removeEventListener("click", flip, false); |
document.getElementById("backPage").removeEventListener("click", flop, false); |
// only need to do this once, so remove this handler now that its job is done |
document.body.removeEventListener("touchstart", noClicks, false); |
} |
</script> |
</head> |
<body onload="init();"> |
<h2>Click, tap, or swipe to turn the page.</h2> |
<div class="page back" id="backPage"> |
<p>Back</p> |
</div> |
<div class="page front" id="frontPage"> |
<p>Front</p> |
</div> |
</body> |
</html> |
Using Gestures to Scale and Rotate Elements
The final example uses pinch and rotate gestures to scale and rotate an element. Gesture events are high-level events that encapsulate the lower-level touch events—they are instances of the GestureEvent class. Gesture and touch events can occur at the same time. Consequently, you can choose to handle touch events, gesture events, or both. The advantage of gesture events is that the location and angle of the fingers are properties of the events. Gesture events support pinching open and closed to zoom in and zoom out, and pivoting to rotate elements.
The example in Listing 8-3 first defines the style of the element to manipulate using CSS. The example then declares three JavaScript functions: one function to set the element’s scale and rotation dynamically during a gesture; a second function to preserve the element’s current scale and rotation when the gesture ends; and a third function to install the first two functions as event listeners. Finally, the example uses HTML to create an element, give it content, and call the function that installs the event listeners on page load. Figure 8-3 illustrates the result.

Listing 8-3 Responding to gesture events
<html> |
<head> |
<title>pinch and rotate</title> |
<style> |
#theDiv {position: absolute; top: 200px; left: 200px; height: 150px; width: 250px; |
border: 2px solid brown; padding: 10px; background-color: #ffcc99; |
text-align: center; |
} |
</style> |
<script type="text/javascript"> |
var angle = 0; |
var newAngle; |
var scale = 1; |
var newScale; |
function saveChanges() { |
angle = newAngle; |
scale = newScale; |
} |
function getAngleAndScale(e) { |
// Don't zoom or rotate the whole screen |
e.preventDefault(); |
// Rotation and scale are event properties |
newAngle = angle + e.rotation; |
newScale = scale * e.scale; |
// Combine scale and rotation into a single transform |
var tString = "rotate(" + newAngle + "deg) scale(" + newScale + ")"; |
document.getElementById("theDiv").style.webkitTransform = tString; |
} |
function init() { |
// Set scale and rotation during gestures |
document.getElementById("theDiv").addEventListener("gesturechange", getAngleAndScale, false); |
// Preserve scale and rotation when gesture ends |
document.getElementById("theDiv").addEventListener("gestureend", saveChanges, false); |
} |
</script> |
</head> |
<body onload="init();"> |
<div id="theDiv"> |
<p> Pinch in to shrink. </p> |
<p> Pinch out to grow. </p> |
<p> Twirl to rotate. </p> |
</div> |
</body> |
</html> |
Copyright © 2016 Apple Inc. All Rights Reserved. Terms of Use | Privacy Policy | Updated: 2016-10-27