Testing Your CloudKit App
Give your CloudKit app a real-world test with multiple simultaneous users by running it on multiple devices using different iCloud accounts. Initially, test your CloudKit app in the development or production environment on designated test devices.
Later upload your iOS or tvOS app to iTunes Connect and test your app using the production environment. Using iTunes Connect, invite internal testers (your team’s iTunes Connect users) or invite external testers (users specifying only their email addresses) to test your app. Testers download your iOS or tvOS app using the TestFlight app. Note that apps distributed via TestFlight or the store can’t use the development environment. To learn more about distributing your app using TestFlight, read Distributing Your App Using TestFlight (iOS, tvOS, watchOS) in App Distribution Guide.
Distribute Your App Using Ad Hoc Provisioning (iOS, tvOS)
Ad hoc provisioning allows you to run your app on test devices without needed Xcode. Before exporting your app using an ad hoc provisioning profile, register all the devices you want to use for testing in your developer account. Ad hoc distribution uses the same pool of devices that you register for development, so the number of devices you can register is limited. To register multiple test devices, read Registering Devices Using Member Center.
When you export your app for ad hoc testing, you choose the development or the production environment. If you have not deployed your schema to production, as described in Deploy the Development Schema to Production, choose the development environment.
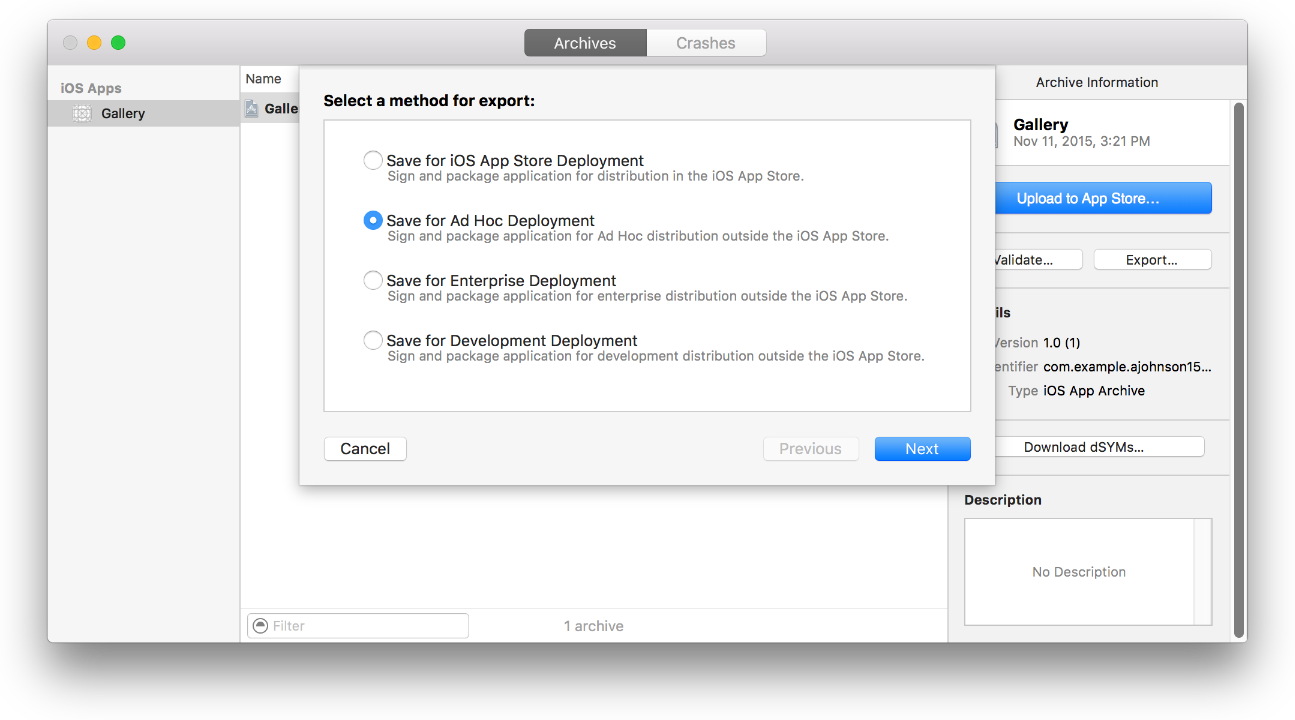
To archive and export your app for ad hoc testing
Choose a generic device, or a device connected to your Mac, from the Scheme toolbar menu and click Run.
You can’t create an archive of an app that is built for a simulator.
Choose Product > Archive.
The Archives organizer appears and displays the new archive.
In the Archives organizer, select the archive and click Export.
Select “Save for Ad Hoc Deployment,” and click Next.
In the dialog that appears, choose a team from the pop-up menu and click Choose.
If necessary, Xcode creates a distribution certificate and an ad hoc provisioning profile for you.
In the Device Support dialog, choose whether to export the universal app or a variant for a specific device, and click Next.
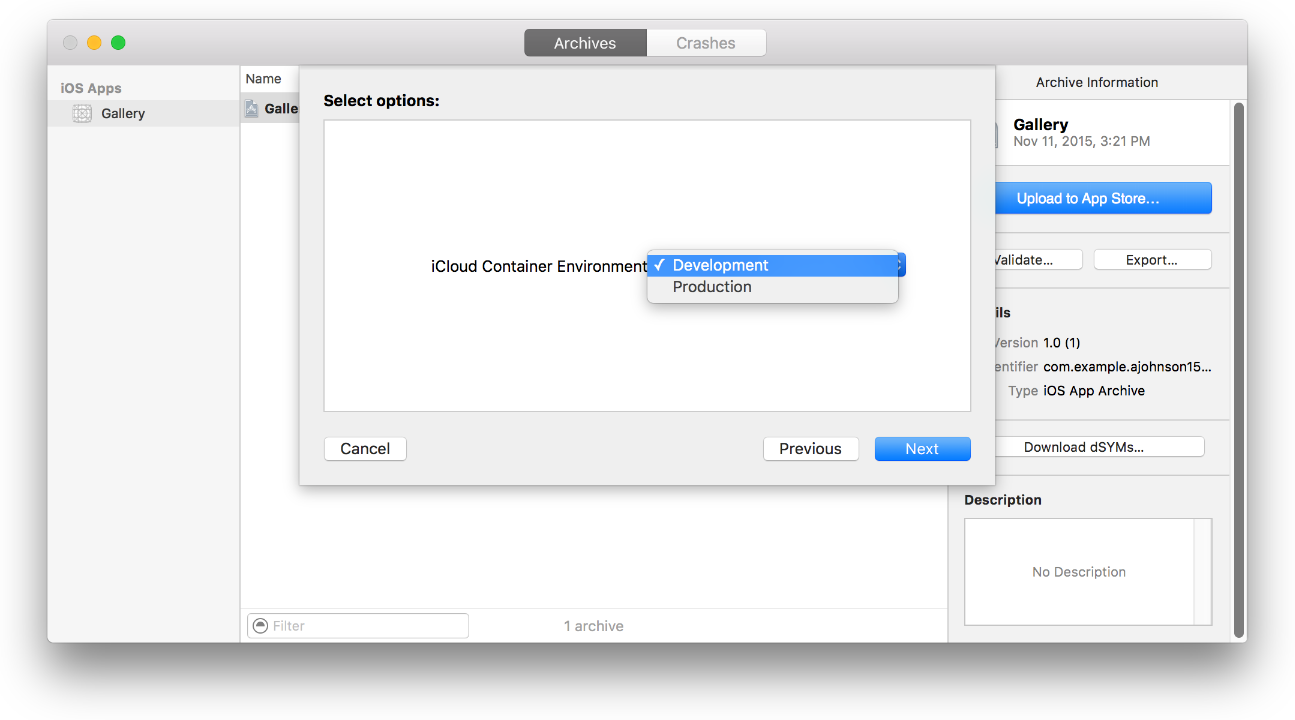
In the next dialog, choose a container environment from the pop-up menu and click Next.
Choose Production to access the data in the production environment.
Choose Development to access the data in the development environment.
In the dialog that appears, review the app, its entitlements, and its provisioning profile, and click Export.
The name of the ad hoc provisioning profile begins with the text
XC Ad Hoc:.Enter a filename and location for the iOS App file, and click Export.
The Finder shows the exported files. The iOS App file has an
.ipaextension.
Later, send the iOS App file to testers. Instruct them to install the app on their devices using iTunes, as described in Installing Your App on Test Devices.
Distribute Your App Using the Team Provisioning Profile (Mac)
Register all the Mac computers you want to use for testing in your developer account before exporting your app using Xcode. To add multiple test Mac computers to the team provisioning profile, read Registering Devices Using Member Center. After you add the Mac computers, regenerate the team provisioning profile by refreshing profiles in Xcode, described in Refreshing Provisioning Profiles in Xcode.
To export a code signed app using the team provisioning profile
Choose a target from the Scheme toolbar menu, and click Run.
Choose Product > Archive.
The Archives organizer appears and displays the new archive.
In the Archives organizer, select the archive and click Export.
Select “Export a Development-signed Application” and click Next.
Xcode embeds the team provisioning profile in the bundle and code signs the app with your development certificate.
In the dialog that appears, choose a team from the pop-up menu and click Choose.
If necessary, Xcode creates the needed signing identity and provisioning profile for you.
In the dialog that appears, review the app, its entitlements, and the provisioning profile, and click Export.
The Finder shows the exported file.
Later, distribute the app to testers and run on the designated Mac computers. The app will launch only on Mac computers specified in the team provisioning profile.
If you can’t launch the app on a Mac because the app is from an unidentified developer, bypass the security settings in OS X to launch the app.
To open an app from an unidentified developer
In Finder, Control-click the app icon.
Click Open.
In the Gatekeeper dialog that appears, click Open.
Recap
In this chapter you learned:
How to use the different methods to distribute your CloudKit app for testing
How to restrict your app to run on designated devices
How to select the development or production container for testing
Copyright © 2017 Apple Inc. All Rights Reserved. Terms of Use | Privacy Policy | Updated: 2017-09-19