Testing Your Plug-in
There are a variety of subtle rendering situations that can arise during normal use of your plug-ins. Users expect plug-ins to handle these situations correctly. These situations include timeline and layer list previews, displaying at proxy resolution, rendering at a lower resolution, and properly handing non-square pixels and fields.
This chapter will aid in testing your plug-ins to make sure that they render properly in all of these situations.
Setting Up a Test Project
Most rendering issues can be tested by creating a single project that renders your plug-ins in a variety of common rendering scenarios.
To test your plug-in, you can create a Motion project with several layers containing copies of the same generator at different pixel aspect ratios. After the project is properly set up, you apply your filters to the generators and verify that they render the same on all layers.
If you want to test your own generators, you can substitute them for the built-in generators described below.
In Motion, create a new project.
The project should have the following following custom settings
Resolution: 1920 x 1080
Field Order: None
Aspect Ratio: Square (1.0)
Frame Rate: 30 fps
Duration: 10 seconds
Click the Library tab, and select the Generators category.
Highlight the Checkerboard generator, and click the Apply button three times to add three copies of the generator to the canvas.
If you are testing your own
FxGeneratorgenerator, use that instead of the Checkerboard generator.At this point, you should have an HD project with square pixels and three generators in the timeline. The next step is going to set each of those generators to render using different pixel aspect ratios.
In the layer list, click the lowest generator in the list. When it’s selected, click the Inspector tab, and then the Generator tab.
You can now see the controls for the generator. The first three parameters of every generator are the width, height, and pixel aspect ratio.
Change the width, height, and pixel aspect ratio parameters by setting the width to 1440 pixels, and then select HD (960x720, 1440x1080) from the Pixel Aspect Ratio pop-up menu.
Select the middle generator in the layer list, and change its width to 960 pixels and its pixel aspect ratio to Anamorphic 2:1.
This changes the generator to have a pixel aspect ratio of 2, which will likely highlight any problems your plug-ins have with non-square pixels.
Testing for Pixel Aspect Ratio Correctness
To test your filters, apply the same filter to each generator in the project. As you turn off the top layer, the middle layer should look the same. Likewise, as you turn off the middle layer, the bottom layer should look the same. If you find that isn’t the case, you aren’t properly handling non-square pixels correctly. The easiest way to handle them is to use the input and output image’s pixel transforms.
If you’re testing a generator, turn off each layer in turn, and check to see whether the newly revealed layer looks the same as the one above it and below it. If you see it get squeezed or stretched out, like this checkerboard example in Figure 8-1, your plug-in is not properly handling pixel aspect ratio.
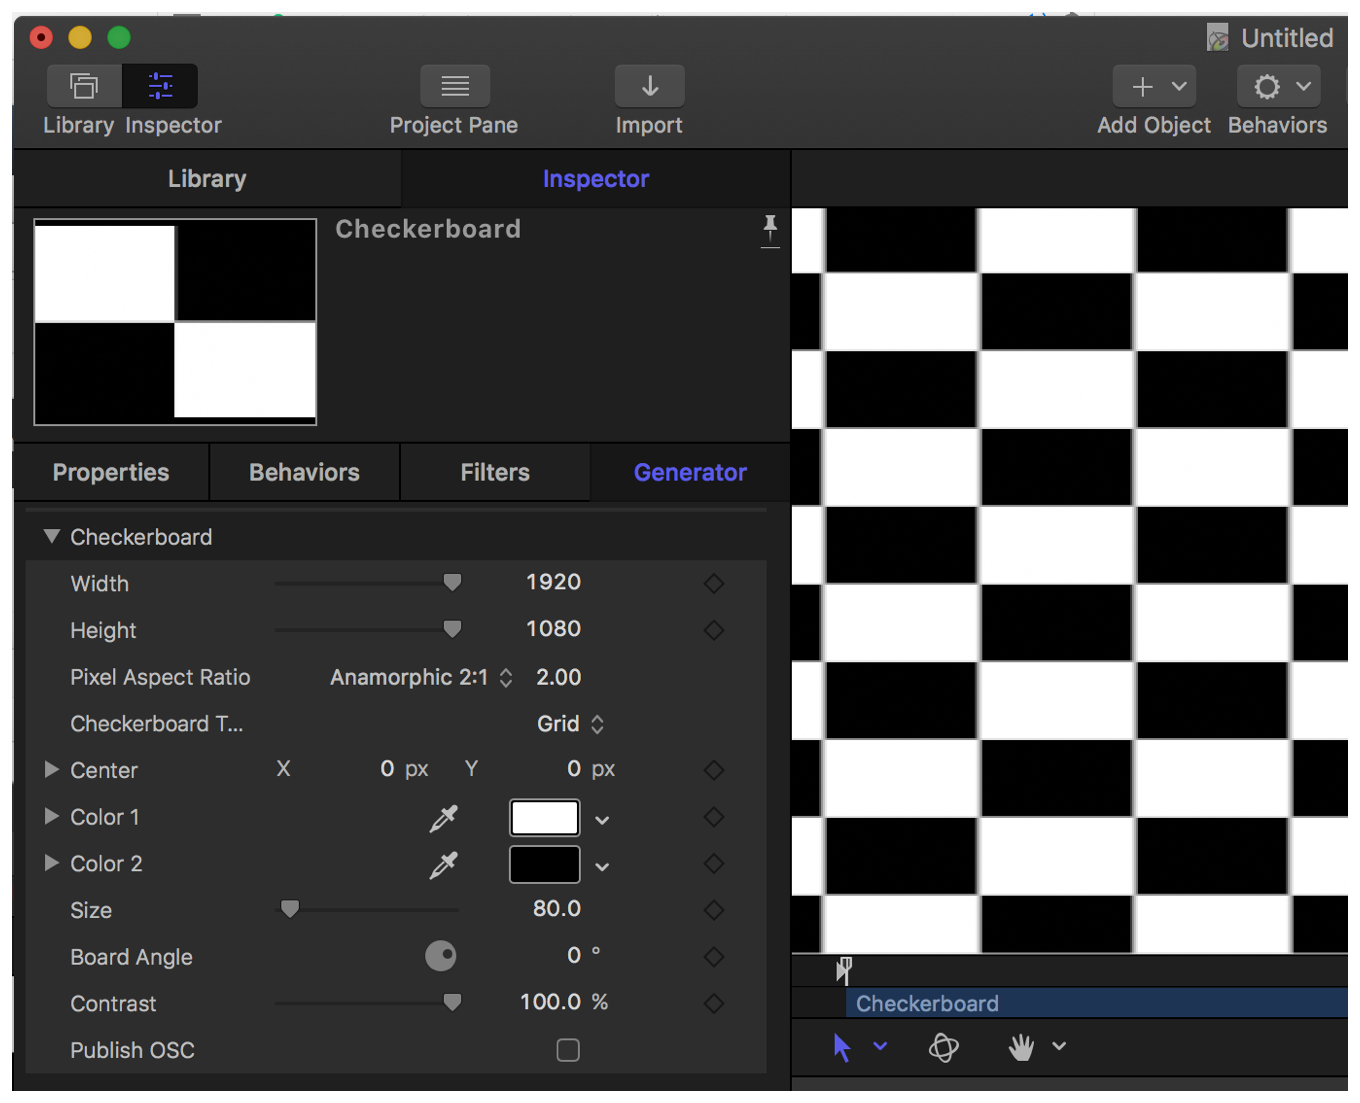
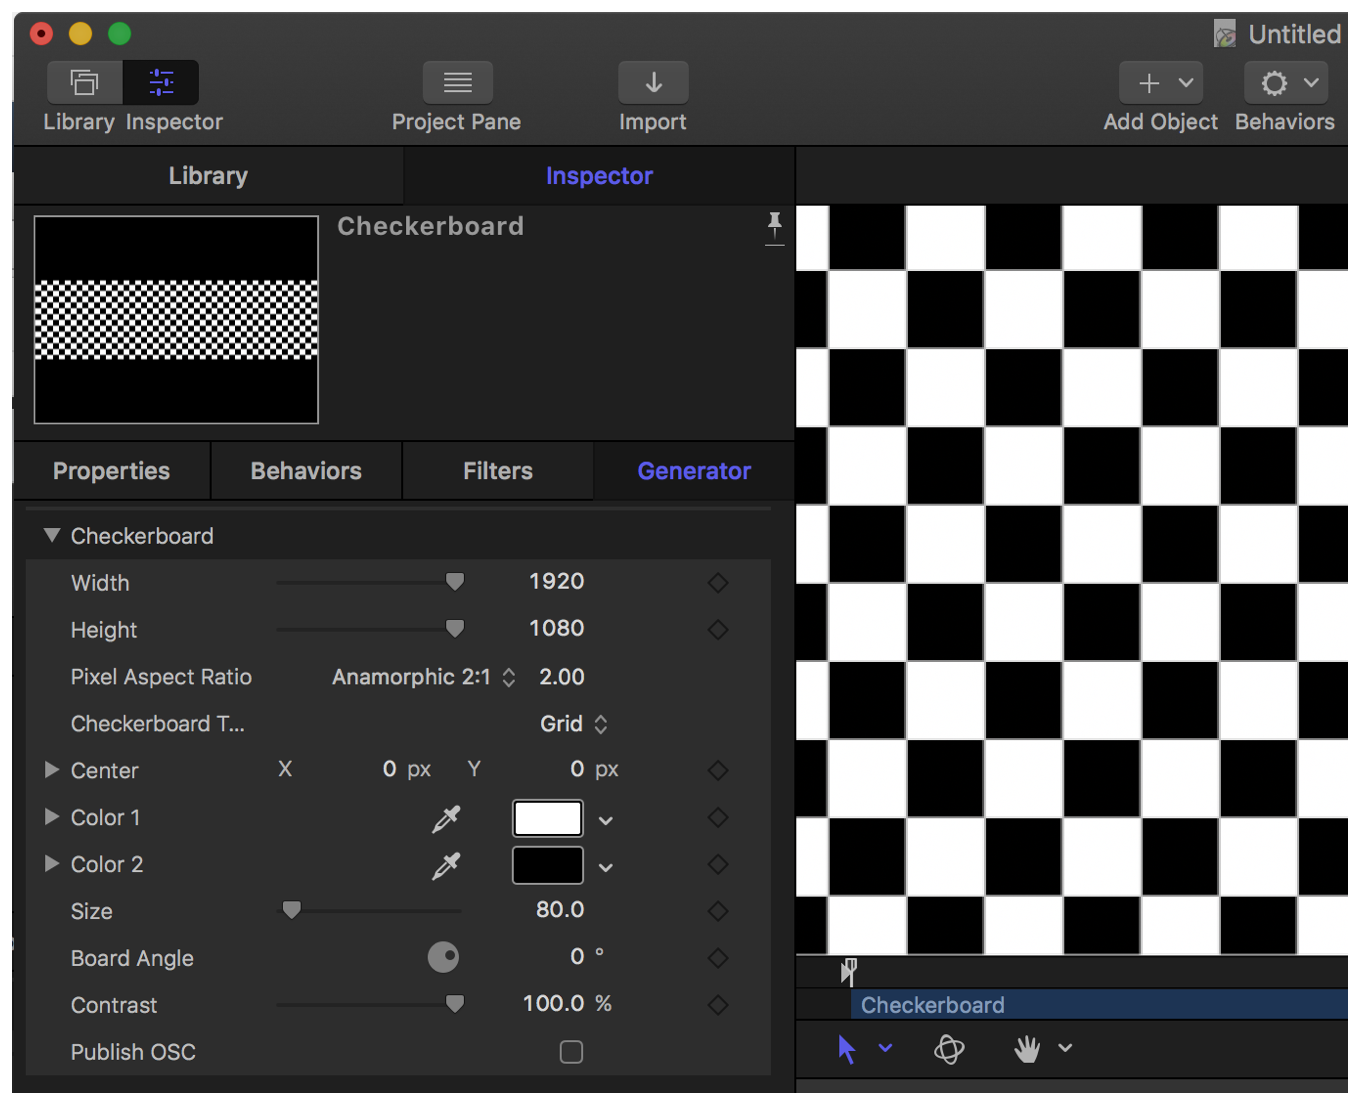
The layer should look like Figure 8-2, regardless of the generator’s pixel aspect ratio setting.
Another important test for your plug-ins is to make sure that point parameters create their effect in the correct place, and that any parameters which are in absolute pixels create the same look, regardless of pixel aspect ratio.
For example, in the checkerboard generator you can set the size of each checker in absolute pixels by adjusting the Size parameter. Despite the fact that the anamorphic layer has half as many pixels across as the layer with a pixel aspect ratio of 1, the checkers remain the same size in both layers for any given value of the parameter.
Testing for Proxy Resolution Correctness
After you’ve tested for pixel aspect ratio correctness, chances are you’re already handling proxy resolution correctly. This is because proxy resolution is a uniform scaling, whereas pixel aspect ratio is a nonuniform scaling. If you’re using pixel transforms to do the scaling, and you’ve got things working correctly for non-square pixels, proxy resolution is a breeze.
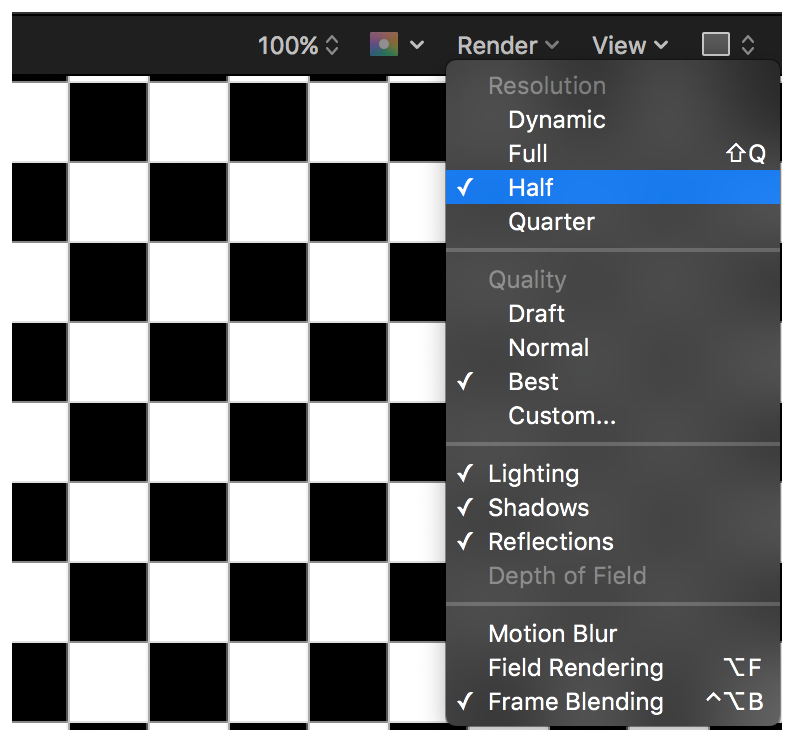
To see if everything is working correctly at proxy resolution, click the Render pop-up menu just above Motion’s canvas, and select Half as the new resolution. The resolution of the footage drops, but your effect shouldn’t change. Next, try switching to quarter-resolution and see what happens. If the effect remains the same, then you’ve properly handled proxy resolution.
Figure 8-3 shows the generator at full-resolution.
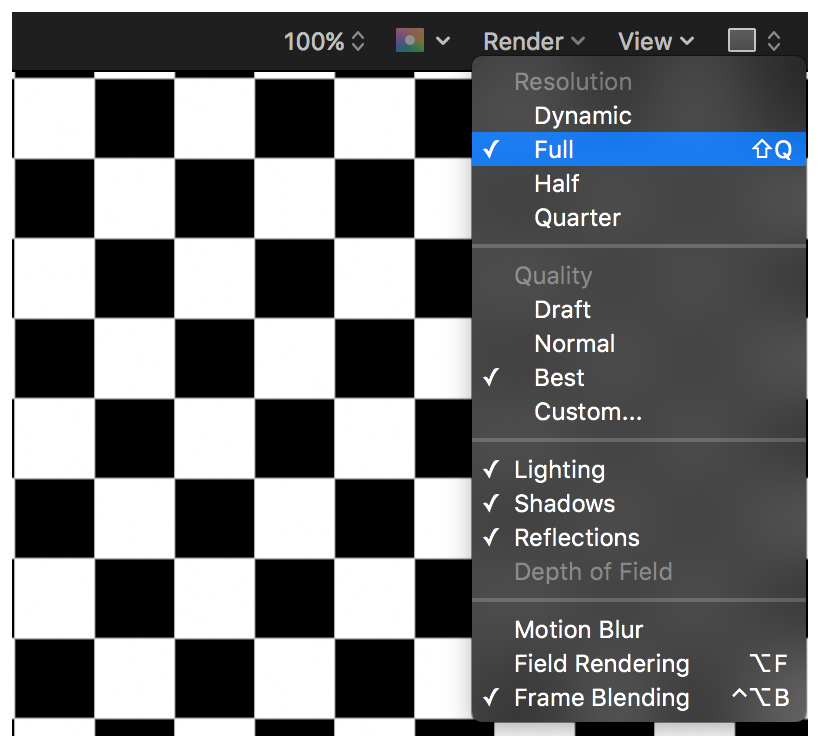
Figure 8-4 shows what it looks like at half-resolution when it doesn’t properly handle pixel transforms.
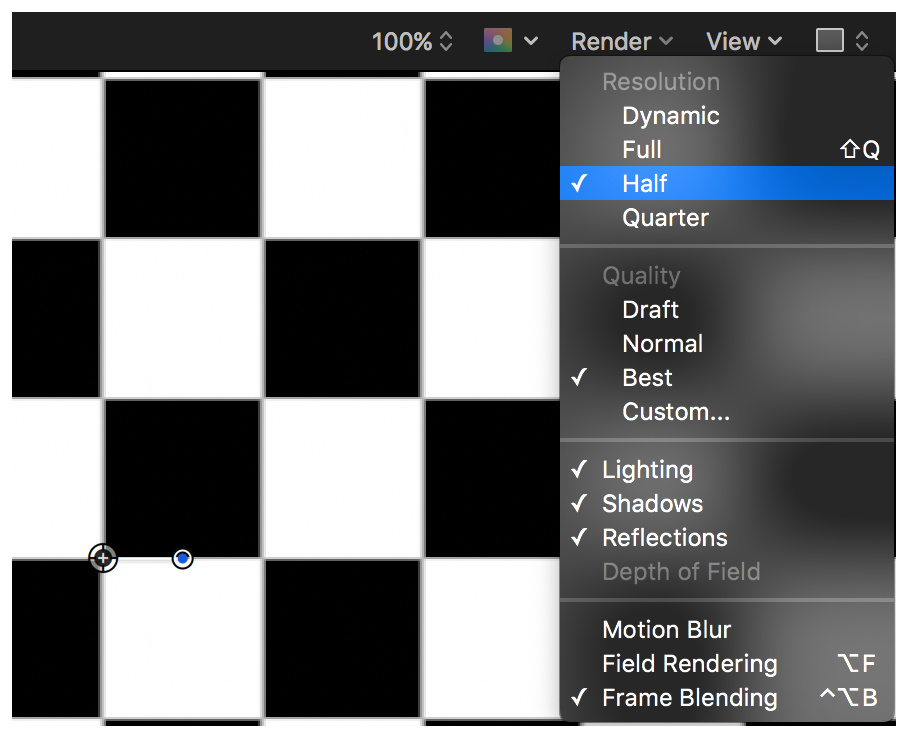
Figure 8-5 shows the output at half-resolution when pixel transforms are properly taken into account.
Testing for Correct Thumbnail Previews
Similarly, if you have pixel aspect ratio and proxy resolution working correctly, chances are that your plug-in is properly handling thumbnail generation. You can check by opening up the layer list and examining the previews. If the previews show any enlargement or cropping, then you probably aren’t handling them correctly.
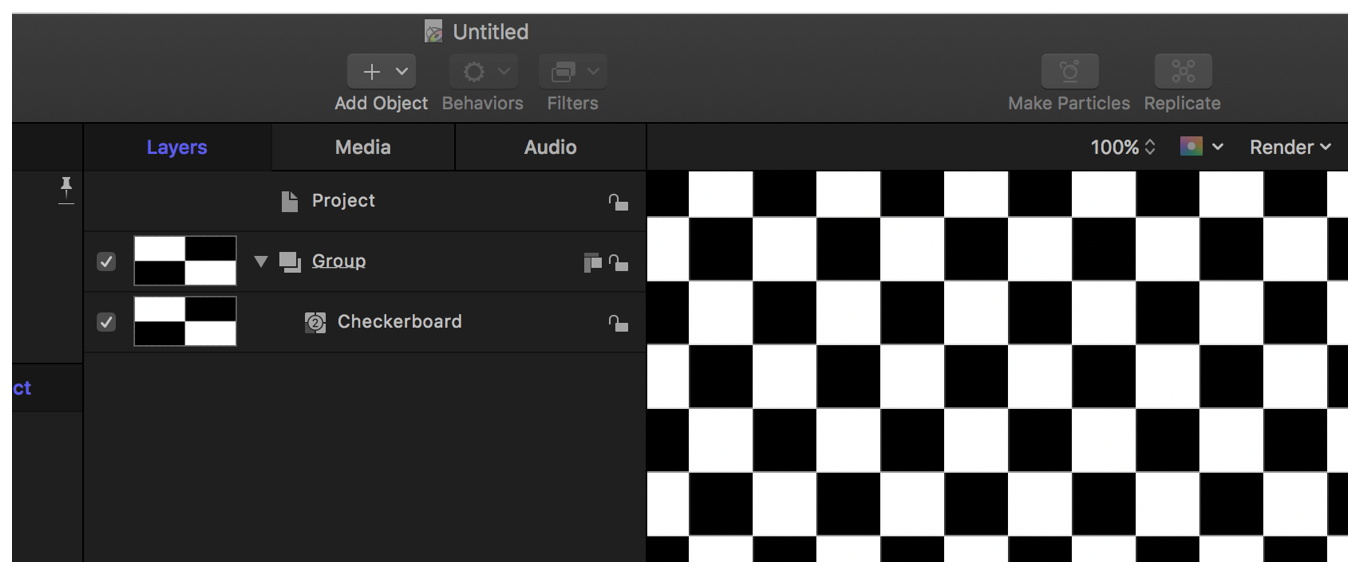
The example in Figure 8-6 is rendered incorrectly. Notice that the preview in the layer list shows checkers that are the same size as the checkers in the canvas, which is at full-resolution.
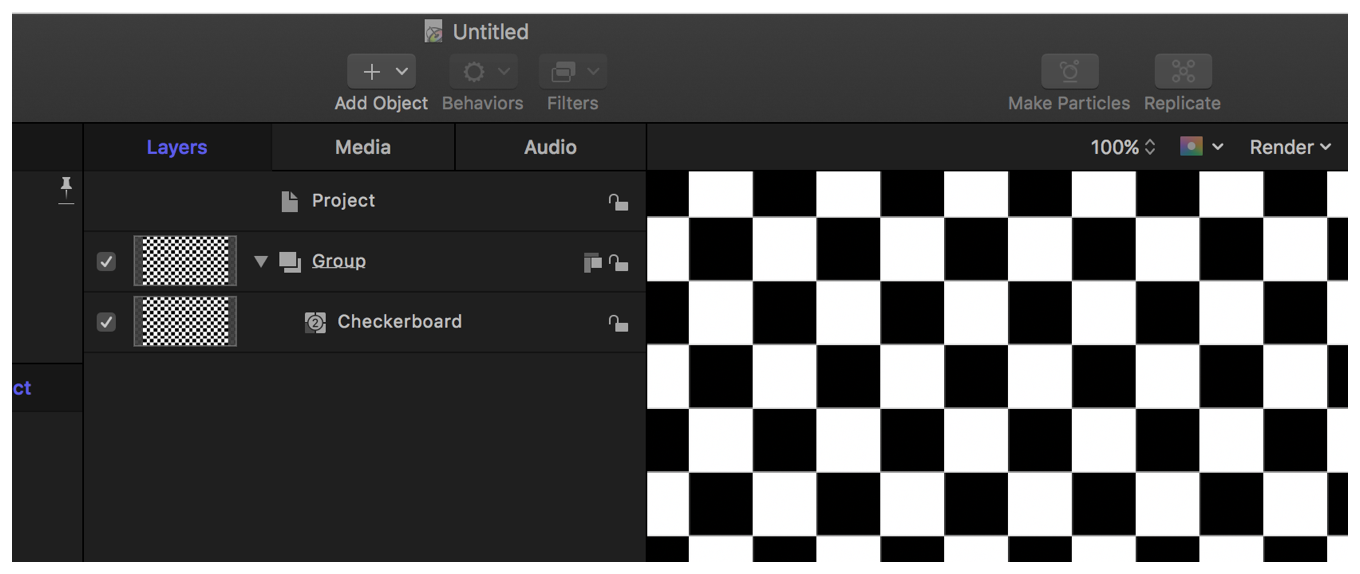
Instead, it should show a smaller version of the entire layer in the layer list, as shown in Figure 8-7.
What To Do If Things Don’t Render Properly
There are a number of things that can go wrong when dealing with non-square pixels and with proxy resolution. The most common problem is that some aspect of your effect grows or shrinks inappropriately when applied to non-uniformly scaled footage. Circles get stretched or squished into ovals, or things get twice as large when going into proxy resolution.
As mentioned above, the best way to deal with these anomalies is to use pixel transforms. They are described more thoroughly in Creating Pixel Transforms. But briefly, the way to handle any problem related to nonuniform scaling is to transform each pixel’s coordinates from the output image’s pixel space into full-sized, square pixel image coordinates. Then perform any computations you need to on the coordinates using your parameters as you normally would (without scaling them). Finally, transform back into the input image’s pixel space to sample the input image.
Copyright © 2005, 2016 Apple Inc. All Rights Reserved. Terms of Use | Privacy Policy | Updated: 2016-10-27