Creating an Application Using ImageKit
This section shows you how to build an image capture application that browses for cameras available over USB or the network, allows the user to select one, then shows the camera’s contents and allows the user to download images.
This section uses the image capture classes of ImageKit. Even if you ultimately intend to use ImageCaptureCore to create an application with a custom UI, you should read this section.
Step One
Launch XCode (\Developer/Applications/Xcode), choose Create a new Xcode project, then choose Cocoa Application. Give your project a name, add the Quartz.framework, and save it. Xcode automatically creates necessary files such as main.m and MainMenu.xib. Your project should look much like Figure 2-1.

Step Two
Open the main menu in Interface Builder (in the Xcode project window, click Interface Builder Files, then double-click MainMenu.xib).
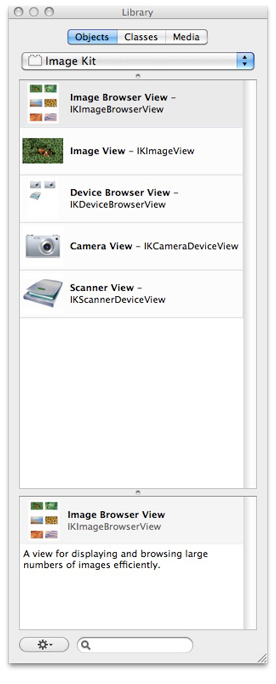
In Interface Builder's Library window, use the pop-up Library menu to choose the ImageKit library. This displays a list of ImageKit objects, as shown in Figure 2-2
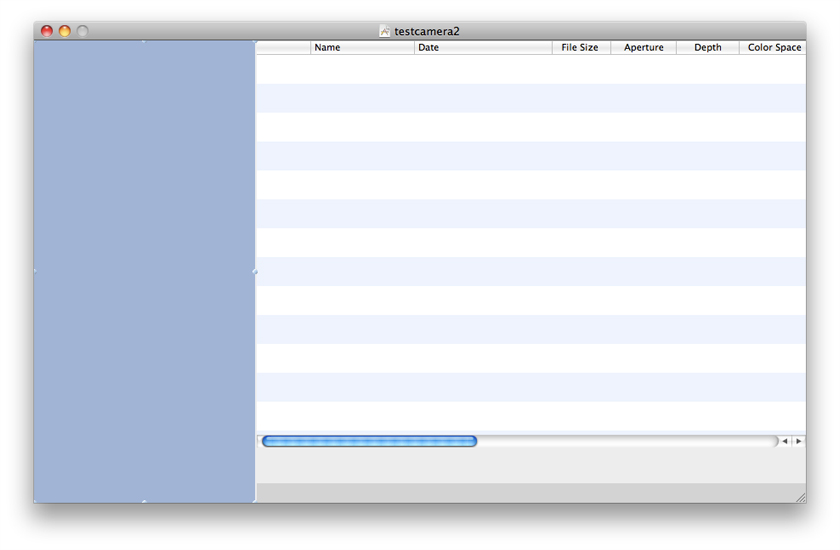
Drag a Device Browser View into the left half of your window and size it as desired. Drag a Camera View into your window alongside your browser view and size it as desired. Your window should look something like Figure 2-3. The device browser view is the blue rectangle on the left, and the camera view is the blue-and-white striped area on the right.
Command-click the browser view, drag to the camera view, and release. This connects the device browser view to the camera view. Choose "delegate" from the pop-up menu that appears when you release the mouse button.
This makes the camera view a delegate for your browser view. The browser view displays cameras and scanners, and when the user selects a camera, the selected device opens in the camera view.
Save, switch to your project window, click Build and Run.
Step Three
There is no step three. You're done.
Plug in a camera or an iPhone and it appears in the browser, as shown in Figure 2-4.
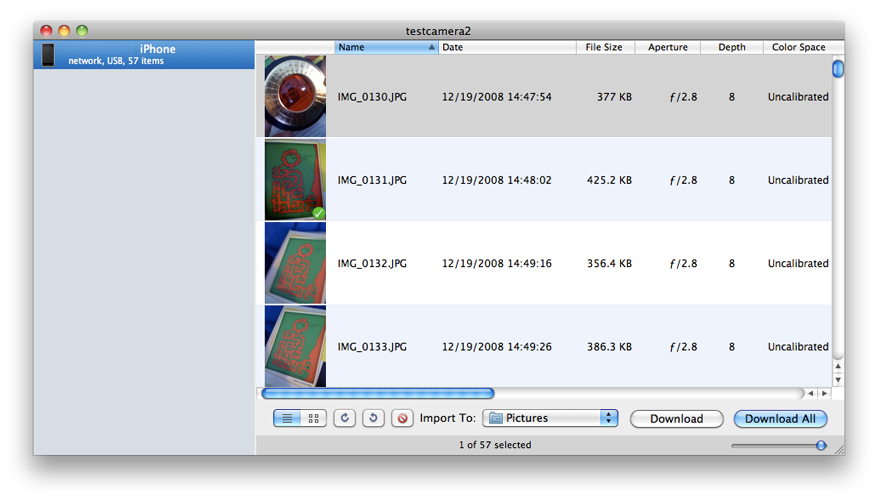
When you add or remove cameras, the browser view updates to show the changes. Select a device and you can view its contents and download images. You can download to a folder, directly to an application, or to an Applescript. You can select a list view or a matrix view of the thumbnails. You can control the thumbnail size with the provided slider. You can also rotate or or delete images using the buttons provided.
Copyright © 2009 Apple Inc. All Rights Reserved. Terms of Use | Privacy Policy | Updated: 2009-08-29