

Creating and Assigning Tags
Tags are used to identify and manage sets of on-demand resources. Assigning one or more tags to a resource in your project identifies it as an on-demand resource. At runtime, all calls for managing on-demand resources work with tags, not individual resources. Runtime management of on-demand resources is covered in Accessing and Downloading On-Demand Resources.
Resource Tags in Xcode
Xcode provides tools for creating and editing tags, adding and deleting the resources that are part of a tag, and specifying when the resources associated with a tag are downloaded by the operating system.
The Resource Tags Pane
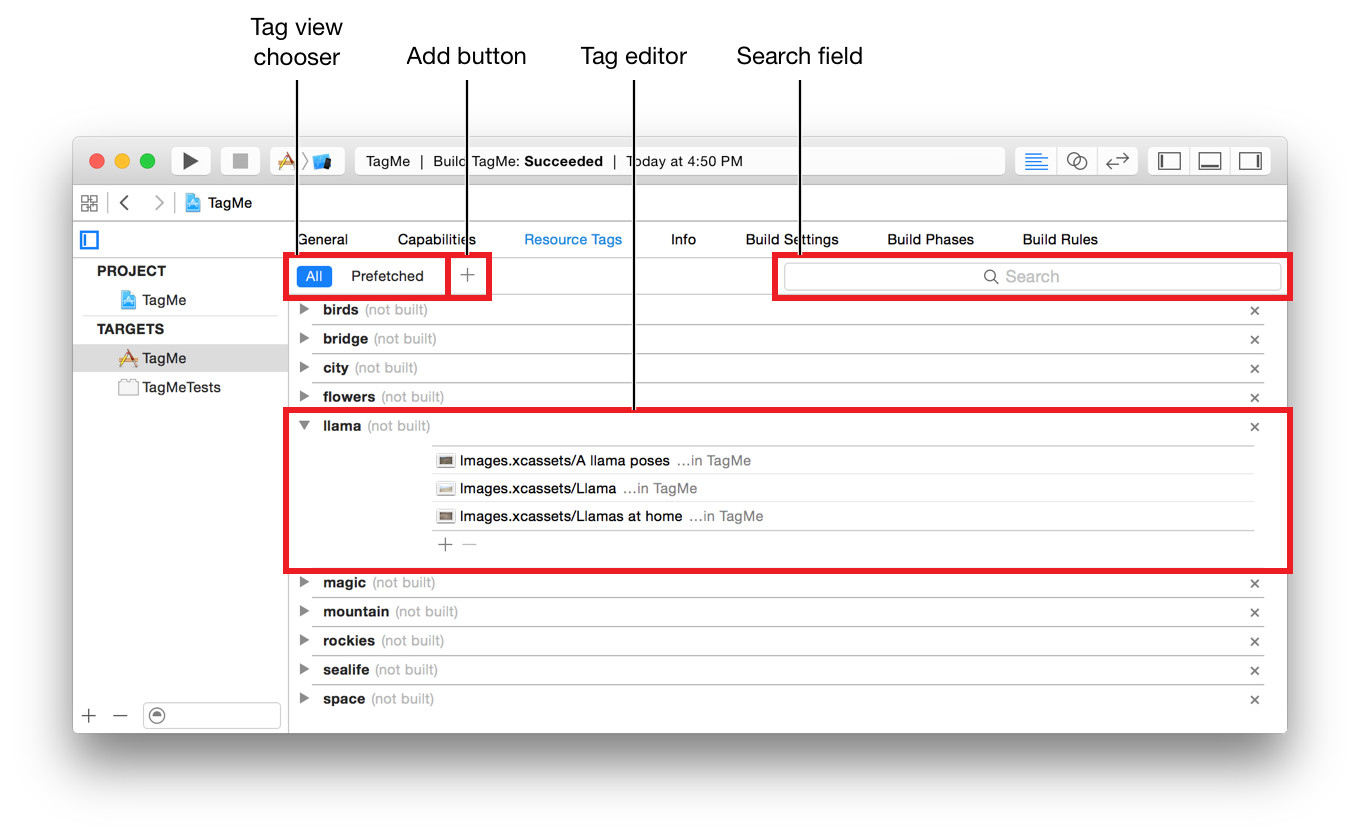
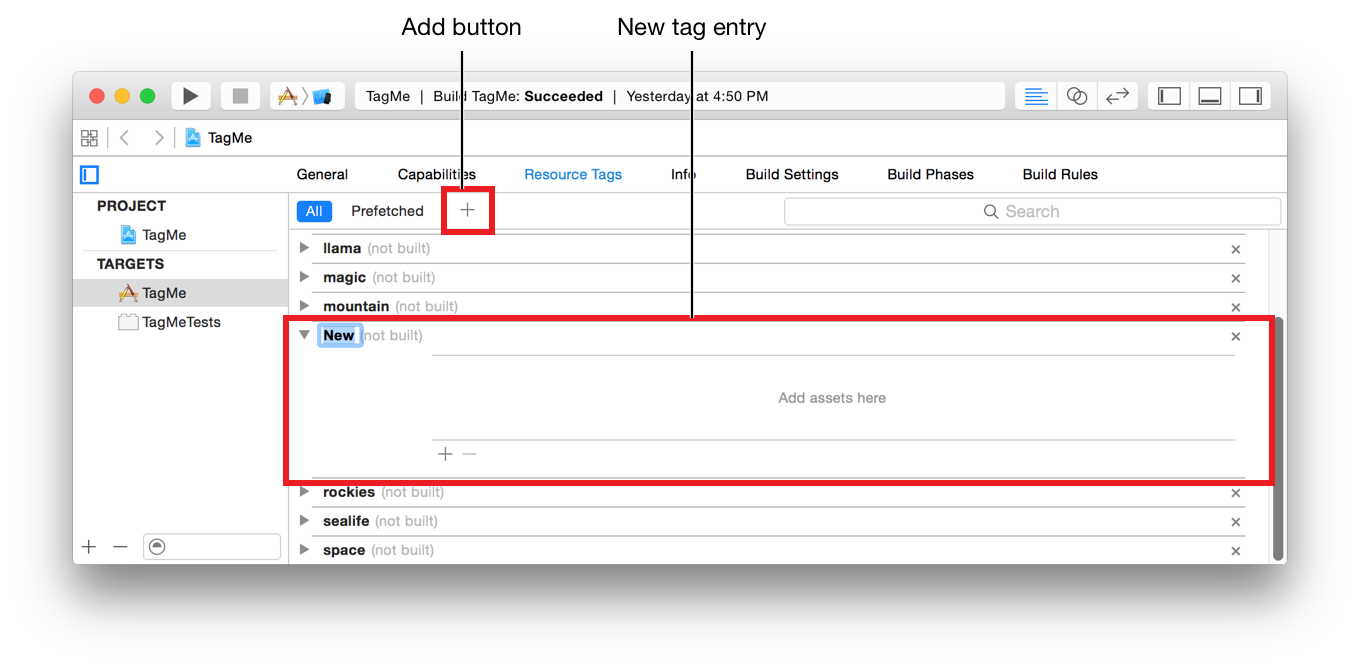
The Resource Tags pane (Figure 3-1) includes:
Tag view chooser. Switch between viewing all tags or viewing tags grouped by prefetch category.
Add button. Create new tags.
Tag editor. Change the name of the tag, delete the tag, and add and delete resources to the tag. The total storage size for all resources that are part of a tag are displayed in parentheses next to a tag name. The size is based on the device that was the target of the last build.
Search field. Find specific tags or resources.
The On-Demand Resource Tags Field
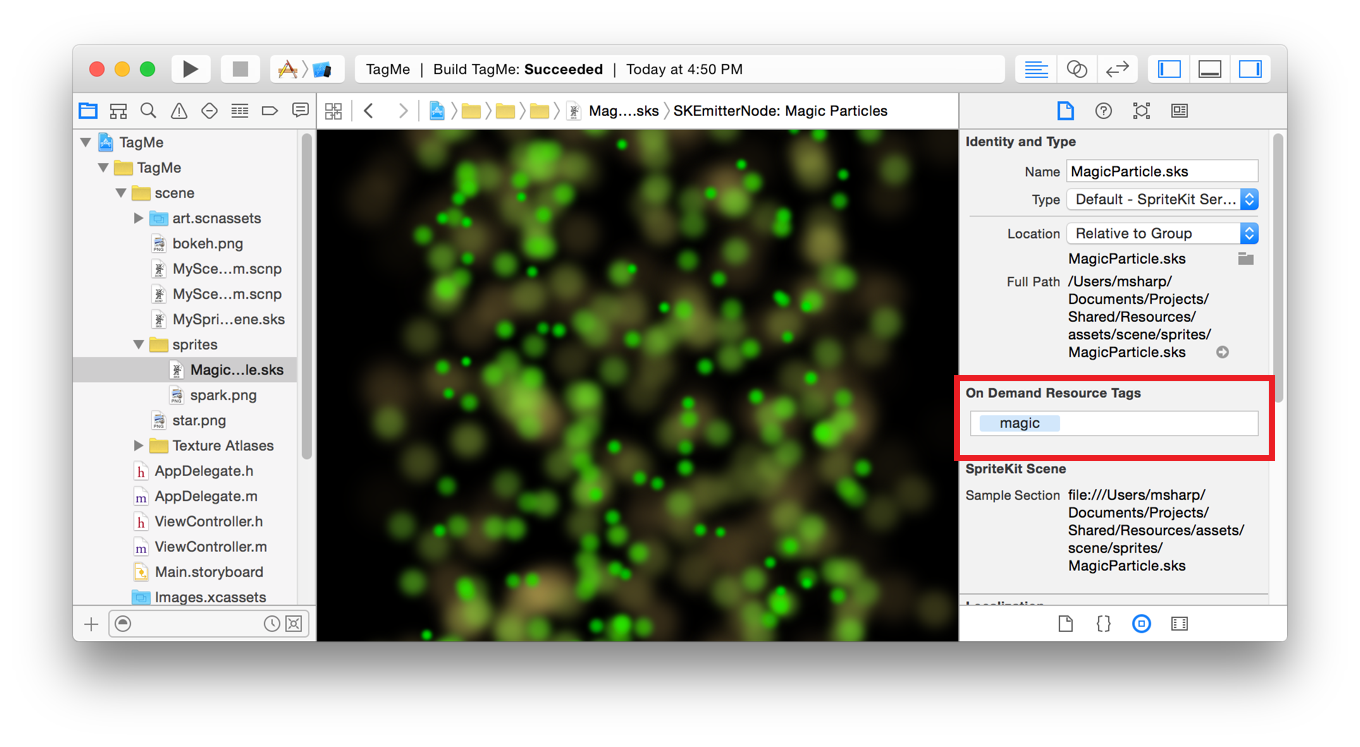
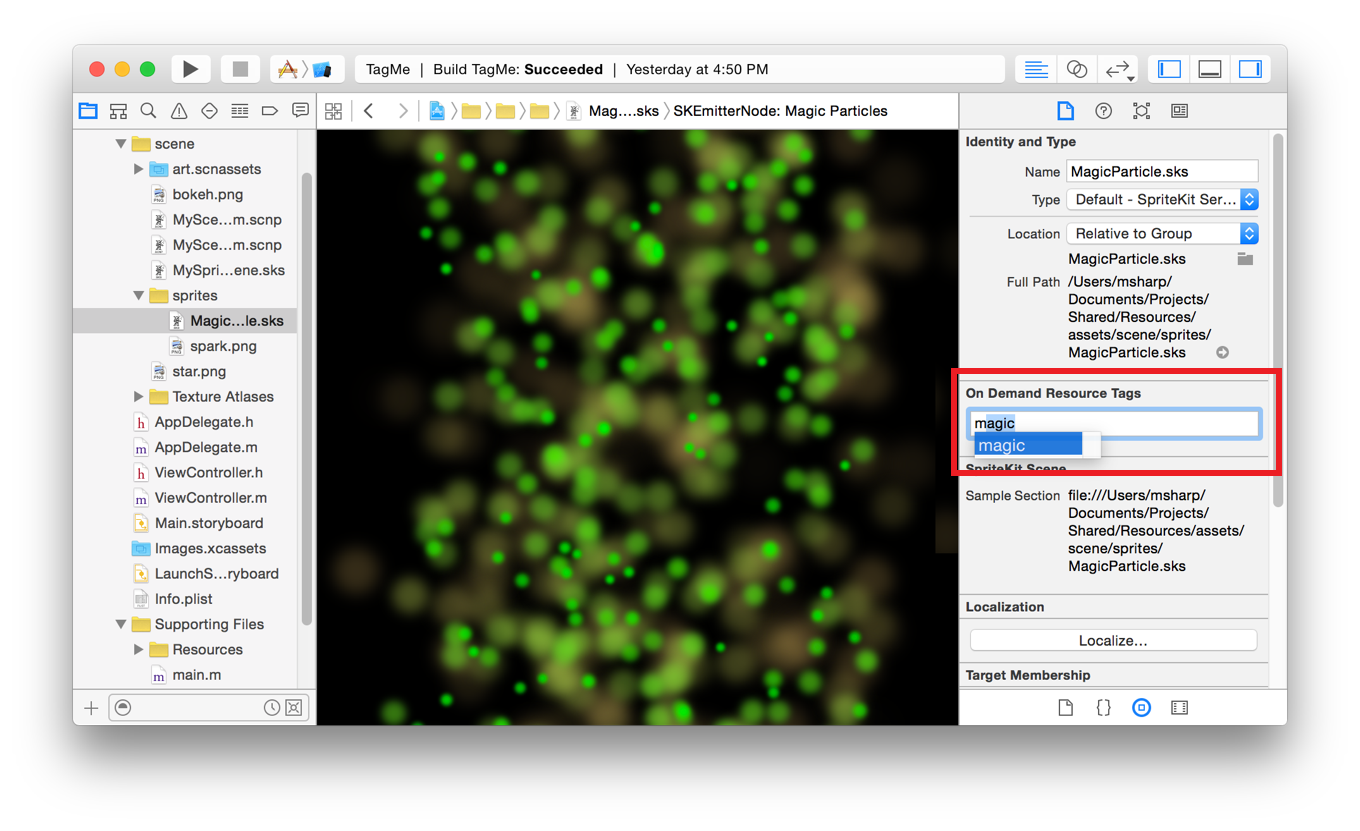
The On-Demand Resource Tags field is a quick way to view, add, and delete tags for a file, folder, or resource. For files and folders in the Project navigator, the field is shown in the File inspector. The field is enabled for folders or for any types of files that can be tagged, as shown in Figure 3-2.
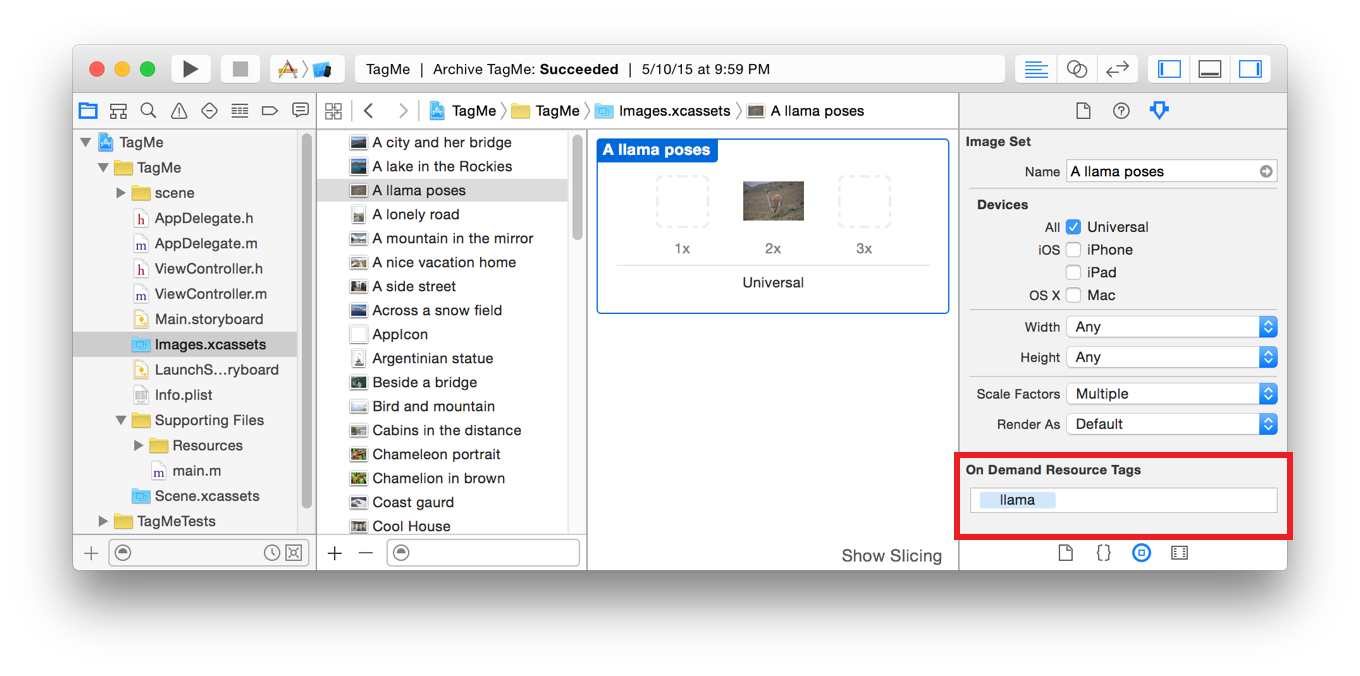
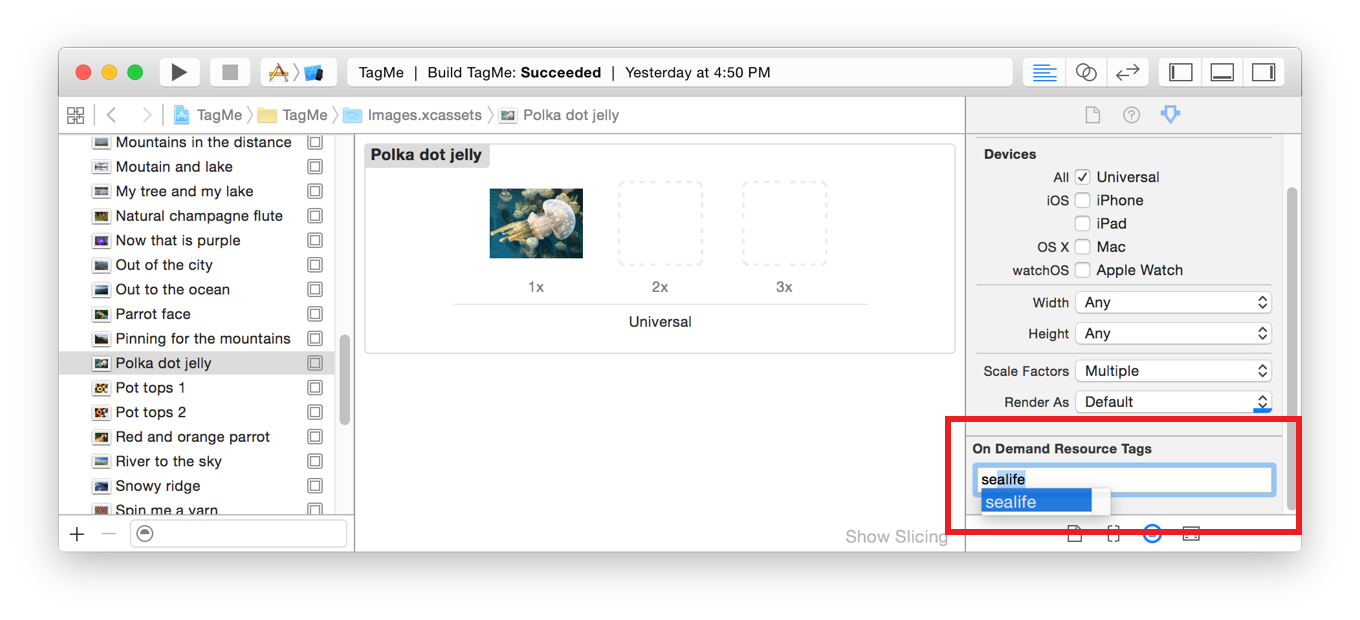
In an asset catalog, the field is shown in the Attributes inspector for folders or for any types of assets that can be tagged, as shown in Figure 3-3. For more information on asset catalogs, see Asset Catalog Help.
When you build your project, Xcode examines all the tagged items in both the project and in asset catalogs and generates the asset packs used by the operating system. The advantage to using asset catalogs is that the on-demand resources will be sliced when they are downloaded to a device. For more information on slicing, see App Thinning (iOS, watchOS).
Creating Tags
The first step in creating tags is examining how your app uses resources at runtime. Look for resources that:
Enhance the user experience but are not required to launch the app. These include resources that provide high-resolution artwork, higher-quality sounds, and other enhancements.
Are required only when the app is in well-defined states.
Resources belonging to these categories are possible on-demand resources. Resources that are required soon after the first app launch can be set to automatically prefetch after installation. For information on how to do this, see Prefetching Tags.
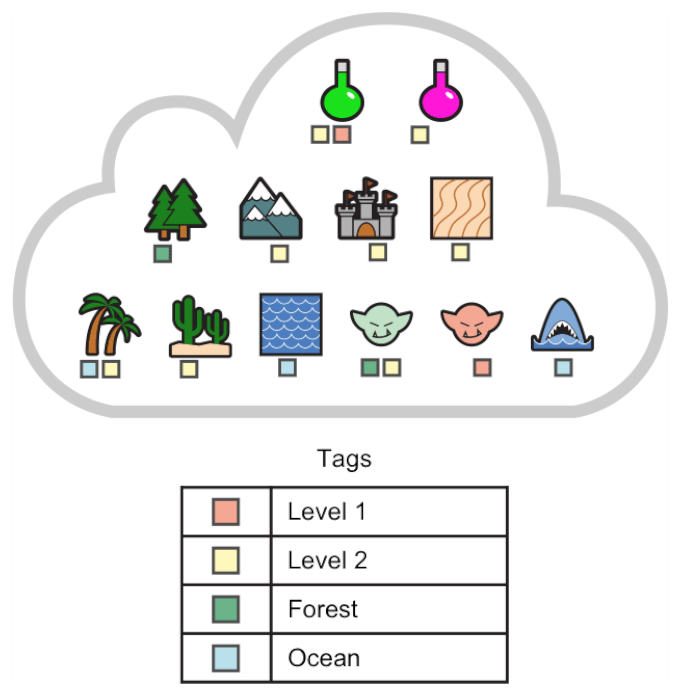
Group the on-demand resources into related sets. The tag name for each set can identify how the resources in that set are used. For example, one set could be all scenery associated with a forest and called forest-scenery. Assigning a tag to a resource makes it a member of set of associated resources for that tag. A resource can be a member of multiple sets. For example, in Figure 3-4, the resources for the game are divided into both levels and locations.
In the project navigator, select the project file.
Open the project editor for the target for the new tag.
Select the Resource Tags pane.
Click the Add button (+) in the upper-left corner of the pane.
Replace the selected placeholder name of the new tag entry with your tag name.
You can also create tags by typing a new name in the On-Demand Resources Tags field as shown in Associating Tags with Resources.
Associating Tags with Resources
Tags can be added to any folder or valid on-demand resource type in an asset catalog or in the project. See Table 1-1 for a list of valid types.
In the project navigator, select an asset catalog.
In the set list, select the folder or resource.
Open the Attributes inspector for the selected item.
In the On-Demand Resources Tags field, type the name of the tag.
Accept the tag name by pressing the Return key.
In the project navigator, select a file.
Open the utilities area and click on File inspector button in the inspector bar.
In the utilities area, click on the File inspector.
In the On-Demand Resources Tags field, type the name of the tag.
Accept the tag name by pressing the Return key.
In the project navigator, select the project file.
Open the project editor for the target.
Select the Resource Tags pane.
In the search field, type the name of the tag.
The list of tags is filtered based on the search string.
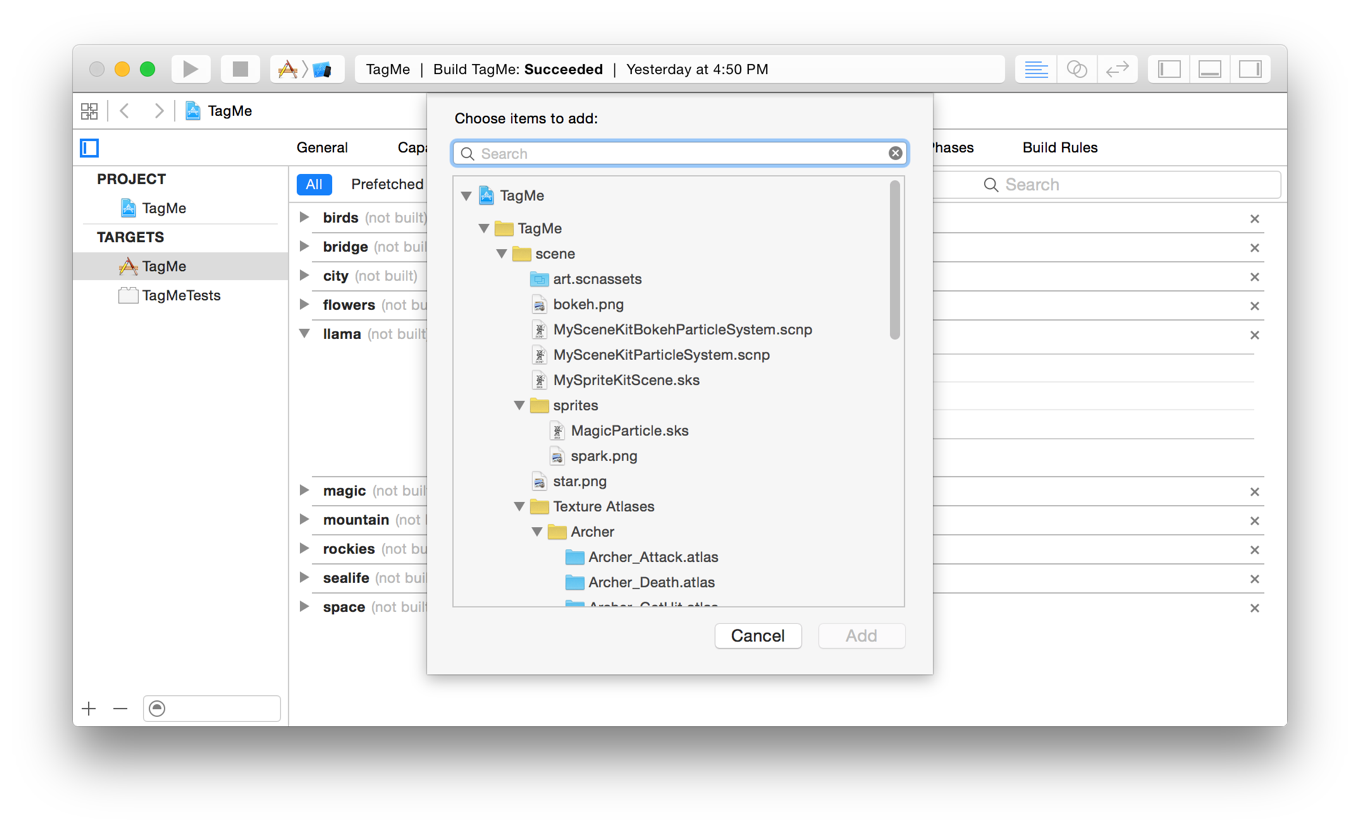
Click the Add button (+).
In the search field, type the name of the resource file.
Select the desired resource file and click Add.
The resource file is added to the tag.
Prefetching Tags
Usually the operating system starts downloading resources associated with a tag when the tag is requested by an app and the resources are not already on the device. Some tags contain resources that are important the first time the app launches or are required soon after the first launch. For example, a tutorial is important the first time the app is launched, but it is unlikely to be used again.
You assign tags to one of three prefetch categories in the Prefetched view in the Resource Tags pane: Initial Install Tags, Prefetched Tag Order, and Download Only On Demand, see Figure 3-5.
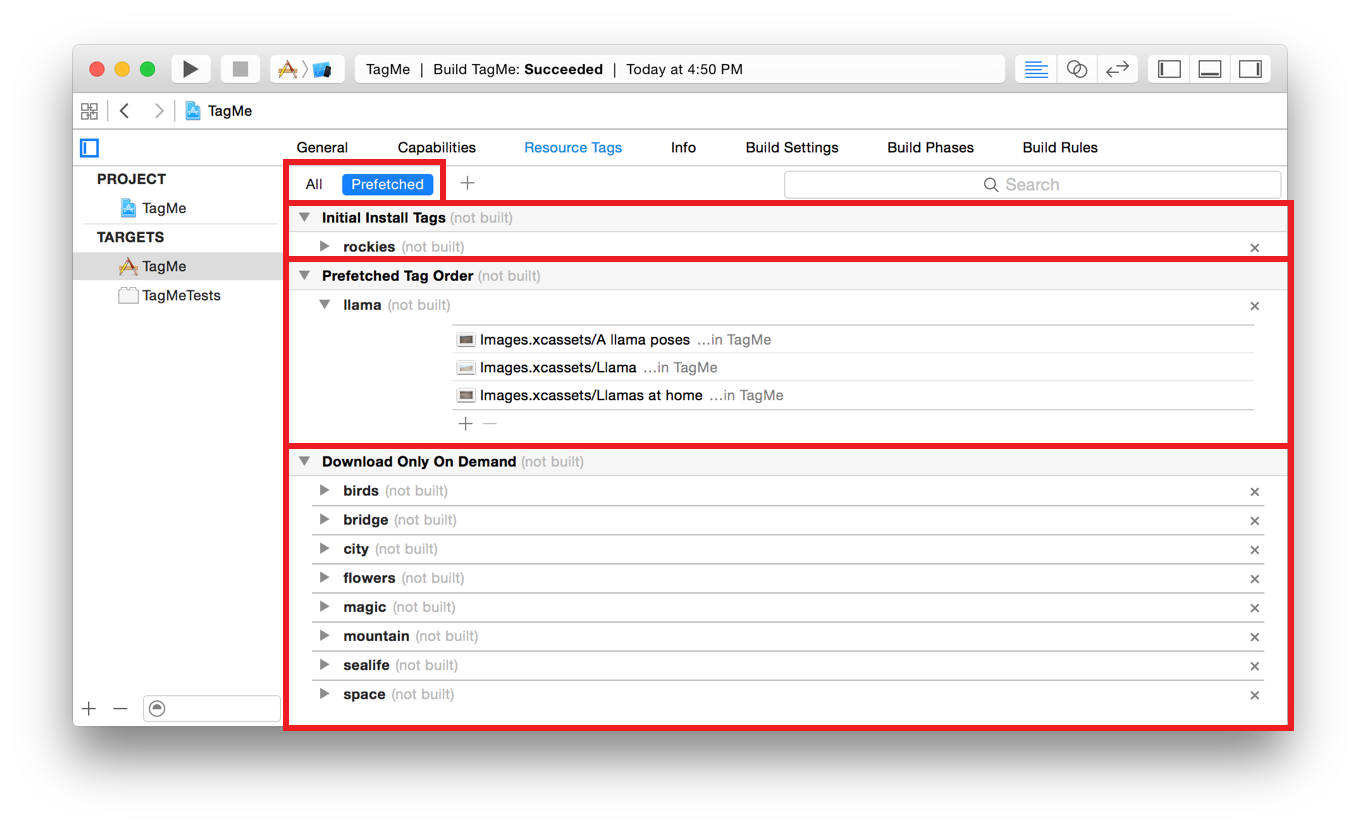
The default category for a tag is Download Only On Demand. The view displays the tags grouped by their prefetch category and the total size for each category. The size is based on the device that was the target of the last build. Tags can be dragged between categories.
Initial install tags. The resources are downloaded at the same time as the app. The size of the resources is included in the total size for the app in the App Store. The tags can be purged when they are not being accessed by at least one
NSBundleResourceRequestobject.Prefetch tag order. The resources start downloading after the app is installed. The tags will be downloaded in the order in which they are listed in the Prefetched tag order group.
Dowloaded only on demand. The tags are downloaded when requested by the app.
Prefetching of on-demand resources occurs only when the app is installed. The resources are downloaded to local device storage but are not retained. If the user takes a long time between installing the app and launching the app, it is possible that prefetched resources are no longer on the device.
When the operating system downloads a tag, it downloads only resources not already on the device.
In the project navigator, select the project file.
Open the project editor for the target.
Select the Resource Tags pane.
In the Tag view chooser, click Preferred.
In the content area, click the disclosure triangle next to the Initial Install Tags category.
In the content area, click the disclosure triangle next to the category containing the tag you want to include in the initial install.
Click and drag the tag into the Initial Install Tags list.
In the project navigator, select the project file.
Open the project editor for the target.
Select the Resource Tags pane.
In the Tag view chooser, click Preferred.
In the content area, click the disclosure triangle next to the Prefetched Tag Order category.
In the content area, click the disclosure triangle next to the category containing the tag you want to be prefetched.
Click and drag the tag into the Prefetched Tag Order list.
The position in the list determines download order. The item at the top of the list is downloaded first.
In the project navigator, select the project file.
Open the project editor for the target.
Select the Resource Tags pane.
In the Tag view chooser, click Preferred.
In the content area, click the disclosure triangle next to the Downloaded Only On Demand category.
In the content area, click the disclosure triangle next to the category containing the tag you want to download only on demand.
Click and drag the tag into the Downloaded Only On Demand list.
Removing a Resource from a Tag
You remove a resource from a tag by removing the tag from the On-Demand Resources Tags field. A resource can also be removed from a tag in the Resource Tags pane.
In the project navigator, select the project file.
Open the project editor for the target.
Select the Resource Tags pane.
In the search field, type the name of the tag that contains the resource you want to remove.
The list of tags is filtered based on the search string.
On the line for the tag, click the disclosure triangle to show the tag editor.
In the tag editor, select the resource from the list.
In the tag editor, click the Delete (–) key.
In the project navigator, select an asset catalog.
In the set list, select an item.
Open the Attributes inspector for the selected item.
In the On-Demand Resources Tags field, select the tag and click Delete.
In the project navigator, select a file.
Open the utilities area and click the File inspector button in the inspector bar.
In the utilities area, click the File inspector.
In the On-Demand Resources Tags field, select the tag and press Delete.
Copyright © 2018 Apple Inc. All rights reserved. Terms of Use | Privacy Policy | Updated: 2017-01-12