

Creating Layered Images
Layered images are required for app icons and optional for other focusable UI elements. If your interface uses UIKit views and the focus API, UI elements that specify the appropriate layers automatically get the parallax effect treatment when they’re in focus. Focusable UI elements should contain a layered image.
At runtime, UIKit understands two different formats that include layered effects. It can read layered images either from asset catalogs or a new layered image file format (.lsr). These formats are supported throughout the system in places where other image formats are supported. For example, achievement images in Game Center are parallax images. Create and export .lsr files using Xcode or the Parallax Previewer app.
Creating LSR Images with the Parallax Previewer App
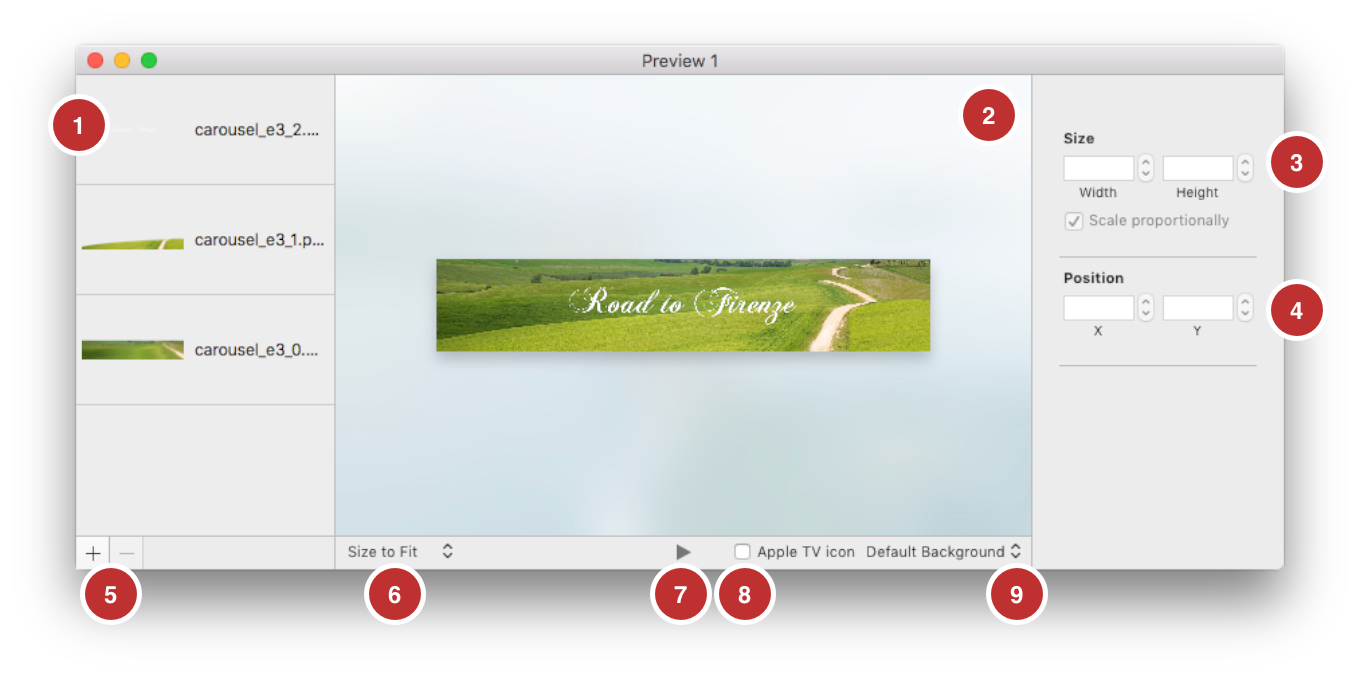
Download the previewer app to create and preview .lsr images. Figure 7-1 shows the Parallax Previewer app. It has the following sections:
Layered image area. Contains each layer that makes up the image.
Viewing area. Combines and displays the layers.
View size. Changes the size of the image for viewing purposes only.
Position area. Adjusts the position of the selected image layer.
Plus and minus icons. Adds or deletes an image layer.
Size area. Adjusts the size of the selected image layer.
Play button. Animates the image to show the parallax effect.
Apple TV icon checkbox. Check to add the Apple TV icon shadow effect.
Background. Click to change the background for the viewing area.
To create an .lsr image:
Import a separate
.pngor.jpegfile for each layer in the image.Adjust the size and positioning of the layers as appropriate.
Click File -> Export -> LSR to create a new LSR file.
Creating LSR Images Within Xcode
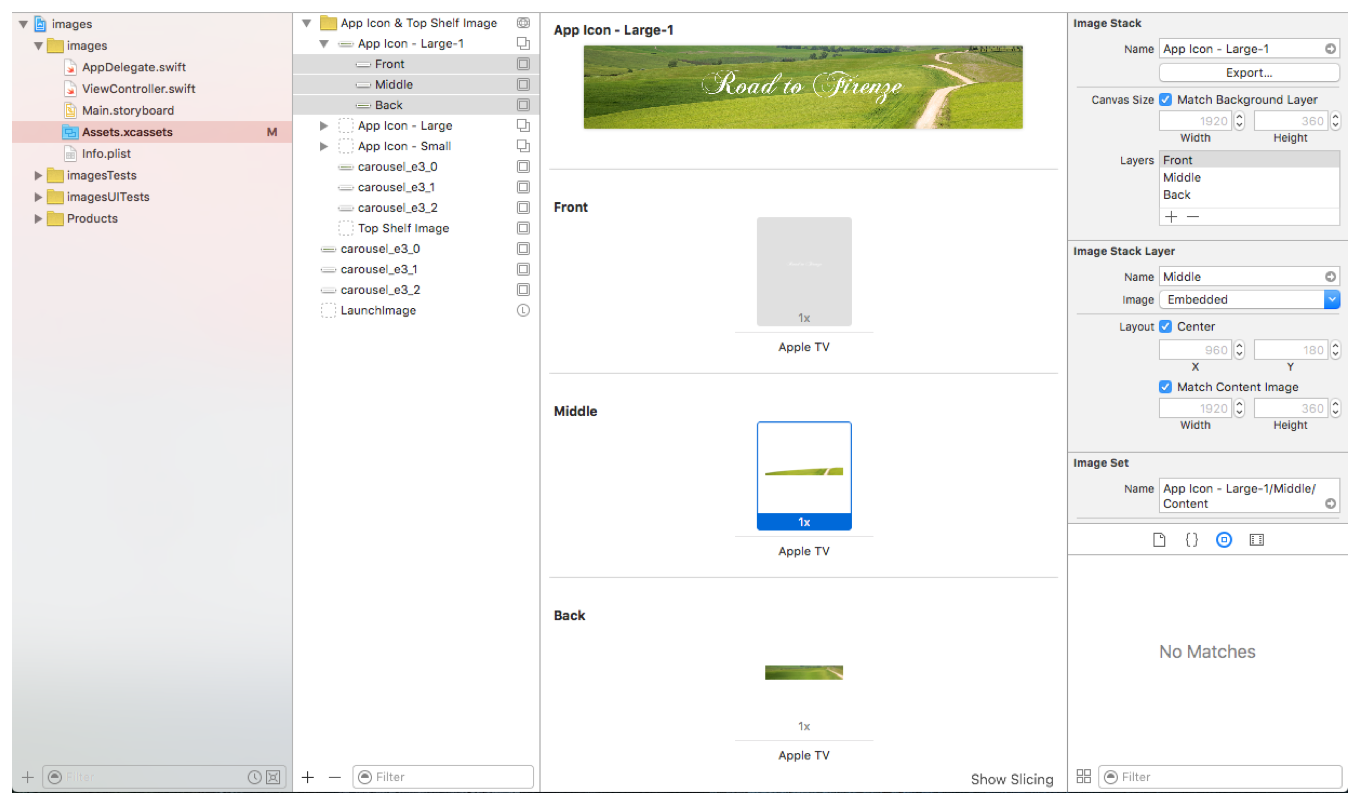
In Xcode, drag existing .png files into your app’s asset catalog to create an image stack. Each .png file represents a different layer for a layered image. To export a layered image in .lsr format, click the Export button in the upper right corner of the Xcode window. Figure 7-2 shows an app icon image.
You can also drag existing .lsr files directly into your asset catalog and they will be included in your app bundle. When the project is compiled, the image stacks and .lsr images in your asset catalogs are transformed into the .car file format and bundled with your app.
Creating an LCR Image
Xcode uses .lsr files or asset catalogs to specify layered image files. These files are processed and included in the app bundle. If you want to load an arbitrary file that is not stored in the app bundle (or on-demand resources), then you need to process it manually into an .lcr file. Use the layerutil command-line tool included with Xcode to create .lcr images. The layerutil tool converts .lsr files into .lcr files.
Open the Terminal and use the following command to create a new .lcr image.
xcrun —-sdk appletvos layerutil —-c <filename.lsr>
The resulting .lcr image will have the same name as the LSR file. You can use the —-o <new_filename.lcr> option to create an .lcr file with a different basename.
Incorporating Layered Images
To incorporate layered images in your app:
Create a
UIImageobject.You load the image differently depending on whether the image is included in your app bundle or whether you have downloaded the image.
Bundle—Load images using
imageNamed:.Downloaded file—Load images using
imageWithContentsOfFile:.
Create a new UIImageView object using the loaded images.
If the
UIImageViewis part of another view, setadjustsImageWhenAncestorFocusedtoYEStrueon theUIImageView.
When the view comes into focus, the layered images will display correctly.
Copyright © 2018 Apple Inc. All rights reserved. Terms of Use | Privacy Policy | Updated: 2017-01-12