Repositories, Snapshots, and Archives
Xcode 4 supports source control repositories for Subversion and Git. It also provides a new snapshot facility that is much faster than the one in Xcode 3. In addition, whenever you build a target for distribution, Xcode 4 saves an archive of the build products.
Take a Snapshot of Your Workspace
Compared with Xcode 3, the Xcode 4 snapshot feature is much faster and more reliable. Xcode 4 snapshots are not compatible with Xcode 3 snapshots, however. To restore to a snapshot you took in Xcode 3, you have to be running Xcode 3, and vice versa.
Note that you must have installed the Git tool by selecting System Tools in the Xcode 4 installer in order to use snapshots.
To create a snapshot manually, choose File > Create Snapshot. In addition, by default Xcode 4 creates a snapshot automatically before a major change such as refactoring your code or executing a find-and-replace operation. Choose File > Project Settings (or Workspace Settings) to change this option.
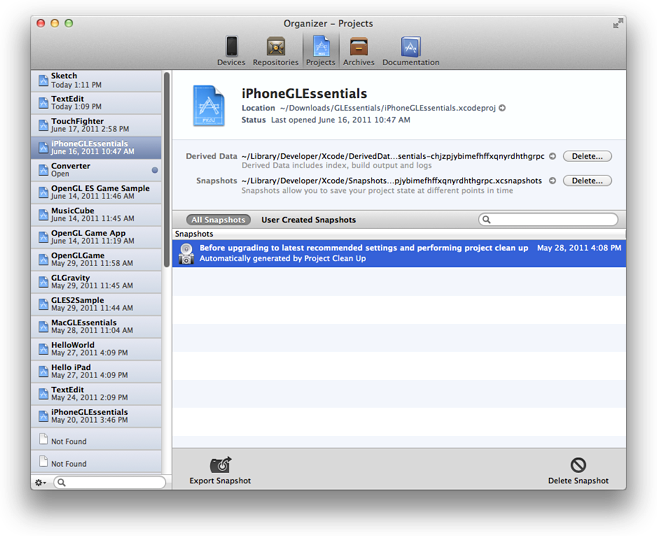
To see the snapshots for a project or workspace, click the project in the Projects pane of the Organizer window.
In Xcode 4.1 and later, to restore a snapshot, choose Restore Snapshot from the File menu and select the snapshot to restore. Xcode displays a preview dialog in which you can review the differences between the current version of the project and the snapshot version. When you click Restore, Xcode replaces the current version of the project with the version in the snapshot. Xcode makes a snapshot of the current version before replacing it.
To restore a snapshot in a new location instead of restoring on top of the current project, select the project in the Projects pane of the Organizer window, choose the snapshot you want to restore, and click the Export Snapshot button at the bottom of the window (Figure 7-1).
Note that, because Xcode 4 keeps track of all your projects and displays them in the Projects pane of the Organizer even if they no longer exist, you can restore a deleted project from a snapshot.
Keep Track of Changes and Coordinate Work Groups
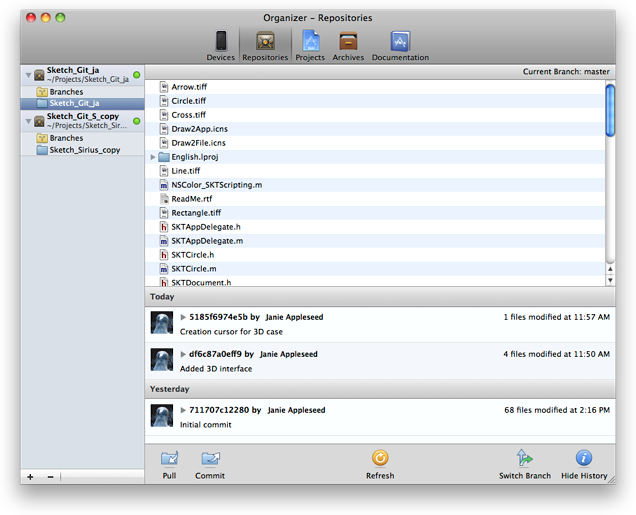
In Xcode 4, you configure SCM repositories in the Organizer (Figure 7-2) instead of a preference pane, as is done in Xcode 3. If you check a project or workspace out of Subversion or Git using the command line or another tool, you can add it to your Xcode SCM repository support. To do so, click the plus sign (+) at the bottom of the navigation pane in the repository organizer and choose Add Working Copy.
Xcode 4 provides a consistent user interface for both Subversion and Git. For example, the Subversion UI now supports annotations. The Xcode 4 installer installs the Git and Subversion tools when you select System Tools.
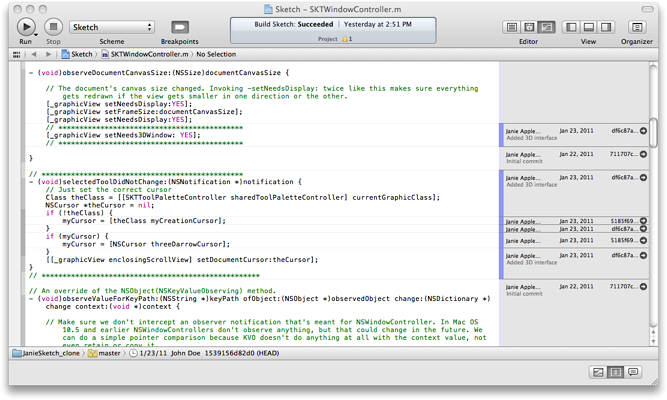
SCM status is shown as a badge in the project navigator (Figure 7-3), as follows:
M | Locally modified |
U | Updated in repository |
A | Locally added |
D | Locally deleted |
I | Ignored |
R | Replaced in the repository |
– | The contents of the folder have mixed status; display the contents to see individual status |
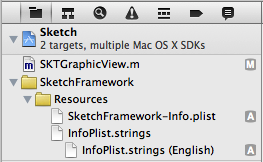
Badges propagate up to the highest container so you can see the source control status of the whole workspace regardless of the disclosure level. Detailed SCM status is shown in the Source Control area of the File inspector in the utility area.
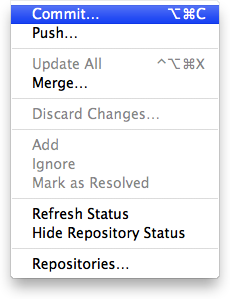
Source control commands are now in the Source Control submenu of the File menu, rather than in a separate SCM menu. When you’ve made changes to files and saved them locally, use the project navigator to select the individual files for which you want to perform a source control operation, and choose the action you wish to perform from the File > Source Control menu (Figure 7-4). Saving a file is not the same as committing it to source control; you must explicitly commit the file. To see which files have been modified locally but not committed, look for the M badge next to the filename in the project navigator. You can use the SCM status filter at the bottom of the project navigator to display only files with SCM status.
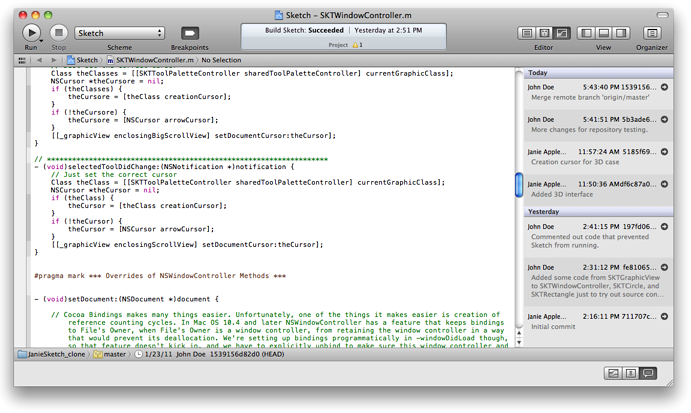
Update and commit operations are recorded in the log navigator. Select a log to see the individual steps of that operation in the editor pane.
Set Up Git Version Control
Xcode creates a Git repository for a new project if you check the Source Control check box in the Save As dialog. When you do so, Xcode adds a hidden file (named .git) to the folder containing the project. That file contains all the information Git needs to keep track of the files in the project and the changes made to them. Xcode also performs an initial commit of the files in the folder. Any time you add files to your project or modify any of the files in the project, you need to commit them to add them to the repository (see Commit Files to Add Them to a Repository).
Note that you must have installed the Git tool by checking the System Tools check box in the Xcode installer in order to create and use a Git repository. This check box is enabled by default.
Commit Files to Add Them to a Repository
When you edit a file, it is changed locally but the changes are not included in the source control repository. To add the changes to the repository, you must commit the file. You must save the file before you can commit it, but note that saving a file is not the same as committing it to source control—you must explicitly commit the file. To see which files have been modified locally but not committed, look for the M badge next to the file name in the Project navigator. (New files that have never been committed to source control have the A badge.) You can use the SCM status filter at the bottom of the Project navigator to display only files with SCM status.
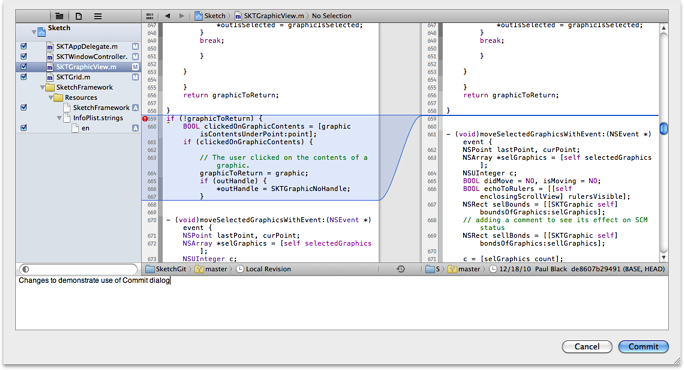
When you choose Commit, a confirmation dialog opens that you can use to make sure the changes you are committing are what you intended (Commit Files to Add Them to a Repository). You can compare your new version with any past version in the confirmation dialog. When you choose File > Source Control > Commit, the confirmation dialog shows all the files with pending changes. Uncheck the checkboxes next to any files that you do not wish to commit. When you choose Source Control > Commit Selected Files from the shortcut menu in the project navigator, only the files you’ve selected in the project navigator are included in the confirmation dialog. In either case, you must enter a comment before committing. You can edit the file in the confirmation dialog before committing. Any changes you make this way are included in the committed file and saved in your project.
Reconcile Different Branches
When you’re ready to merge the code in a separate branch back into the main branch, or when you want to combine the code in any two branches, you can use the merge facility of your source control system to reconcile differences between the branches.
To do so, save and commit any changes, switch to the branch into which you want to merge code, and choose File > Source Control > Merge. In the Merge dialog (Figure 7-6), the left pane shows what the merged file will look like. The right pane shows the file with which you’re merging. For each difference or conflict between the files, an arrow in the center points to the file taking precedence. For example, if the file on the right (the one with which you’re merging) has a line of code missing from the file on the left (your working copy) and the arrow is pointing toward the file on the right, then the line of code will be included in the working copy after the merge operation is complete.
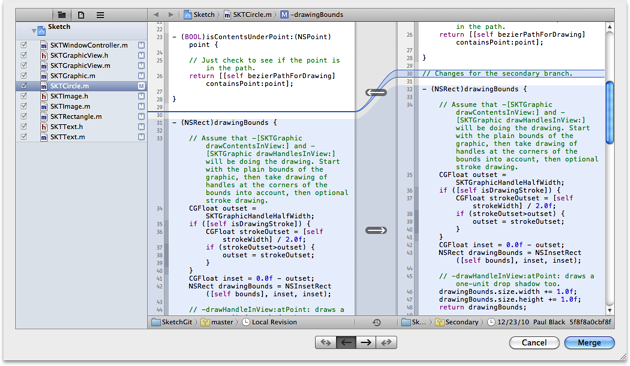
For each difference or conflict, you can use the left and right arrow buttons at the bottom of the dialog to specify which file’s contents should be used. Therefore, to use the contents of the working copy to resolve the top difference in the figure, click on the arrow for that difference and then click on the left arrow button at the bottom of the dialog. Because this line is missing from the current working copy, it is no longer shown in the left pane. In the case of a conflict, there are two additional options for reconciling differences: you can take the code lines from both files, either listing the ones in the left (working copy) file first and those in the right (root copy) file second, or vice versa.
If you wish, you can edit the current branch in the dialog to reconcile any differences not handled by the four choices. Click Merge and commit the changes to the updated files to complete the operation.
Save Internal Project Files in Repositories
In Xcode 4.1 and later, you can use repositories to view internal project files (schemes, user interface settings, and so forth) when looking at SCM details in the SCM commit and update workflows. You can use this facility to save and keep track of versions of project files in the same way as you save and keep track of source files. Figure 7-7 shows a commit dialog displaying two versions of a scheme.

Compare Revisions
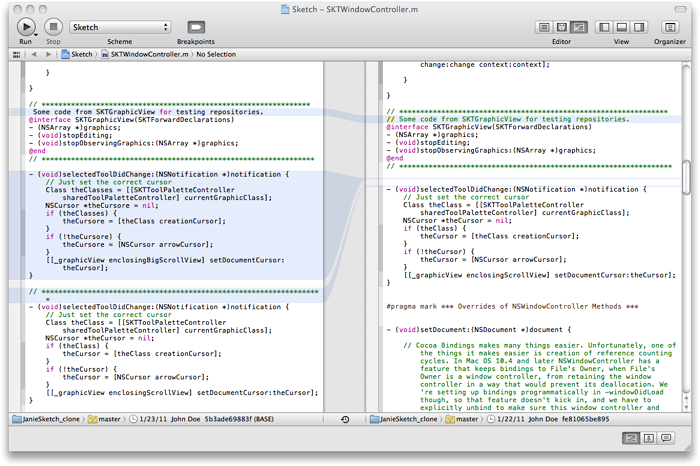
Select any file under source control and click the Version Editor button (![]() ) to display two versions of that file in a side-by-side view. Use the jump bar underneath either editor pane to select the version of the file to compare with the one in the other pane (Figure 7-8).
) to display two versions of that file in a side-by-side view. Use the jump bar underneath either editor pane to select the version of the file to compare with the one in the other pane (Figure 7-8).
Buttons under the version editor allow you to show a file comparison and timeline, change logs for the file, or individual change annotations (“blame”) for each line of the file.
You can edit the current working copy of the file in the version editor and you can copy code from an older version and paste it into the current version. In Xcode 4, the working copy of a file is on the left.
Select Revisions to Compare
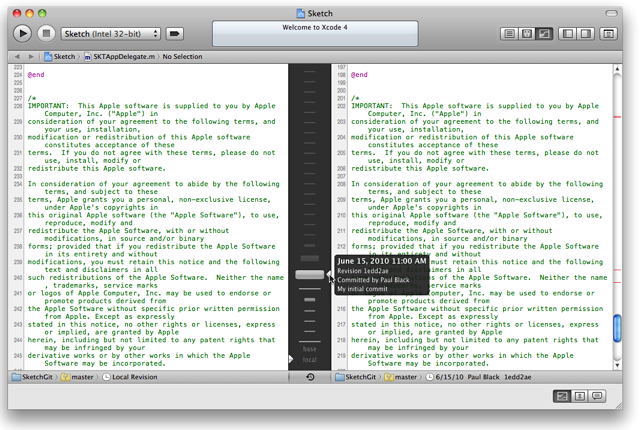
Click the Timeline icon (![]() ) in the center column to show a visual timeline of all repository versions (Figure 7-9); use the sliders to control which version is displayed on each side.
) in the center column to show a visual timeline of all repository versions (Figure 7-9); use the sliders to control which version is displayed on each side.
Review Individual Changes
In Blame mode, the current revision of the file is displayed along with the last revision that modified each line of the file. If you wish, you can use the jump bar at the bottom of the window to select a different revision to examine.
Each log entry is aligned with the line in the file where the change was made. The log entry includes the name of the person who committed the change, the date, and the ID of the commit. Next to the entry is an arrow button. Figure 7-10 shows Blame mode in use.
Click the arrow next to any change that interests you to see that change displayed in Comparison mode. Use the Up Arrow and Down Arrow keys on the keyboard to highlight the change associated with this Blame-mode entry.
List All Revisions Chronologically
To review all revisions to a file listed in chronological order, use Log mode (Figure 7-11). Each change is listed individually, and you can click the arrow next to the log entry to see the change displayed in Comparison mode.
Distribute Your Program or Submit an Application
To build your project and save the resulting application or a disk image of the set of build products, choose Archive from the Product menu. Xcode creates an archive of your project using the build configuration and name you specified in the Archive pane of the scheme editor (see Select a Scheme) and saves the archive in the location specified in the Locations pane of Xcode preferences.
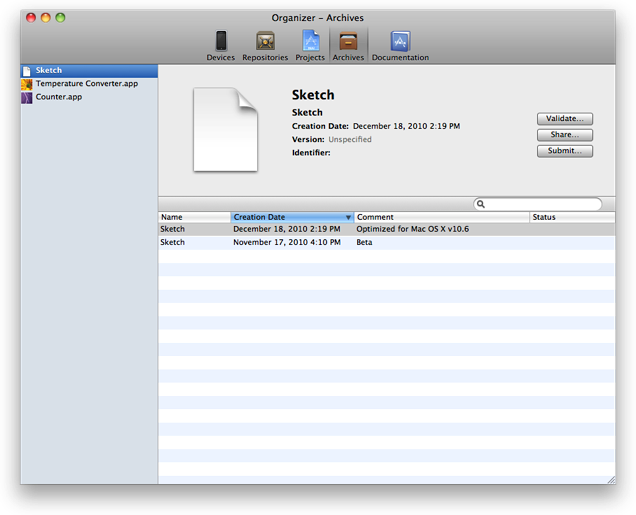
To see the archives for your project, open the Archives Organizer window (Figure 7-10). To submit your application to the app store, you must have an iTunes Connect account. Click Submit to submit the application. Click Validate to run the same validation used by iTunes Connect to make sure your application is ready for submittal. To get a copy of your application that you can package for distribution or share with others, click Share. You can add a comment by clicking on the text field in the Comment column.
Copyright © 2011 Apple Inc. All Rights Reserved. Terms of Use | Privacy Policy | Updated: 2011-08-10