 Table of Contents
  Previous Section
Creating the Application's Output
So far, you have a way for the guest to enter information and a way for the application to store that information. Now, the application needs to do something with the information.For now, you'll have the application simply display the same information the user entered, in a slightly different format. This allows you to verify that you have correctly received the data. To do this, you'll add dynamic string elements (WOStrings) to the main page and bind them. In the next chapter, you'll use more complex forms of output.
- In WebObjects Builder, place the cursor at the end of the document, making sure that it is outside the gray rectangle that represents the form, and press Enter.
- Choose
 from the Elements pop-up list to display the Structures buttons.
- Click
 to create a horizontal line (an <HR> element).
- Press Enter to add a blank line.
- Select
 from the Elements pop-up list to display the Other WebObjects buttons.
- Add a WOString element by clicking
 .
.
- In the object browser, click the guestName variable and drag the cursor to the center rectangle of the WOString.
- Click to the right of the WOString and press Enter.
- Create two more WOStrings and bind them to email and comments, respectively.
- Save your component. It should now look like this:
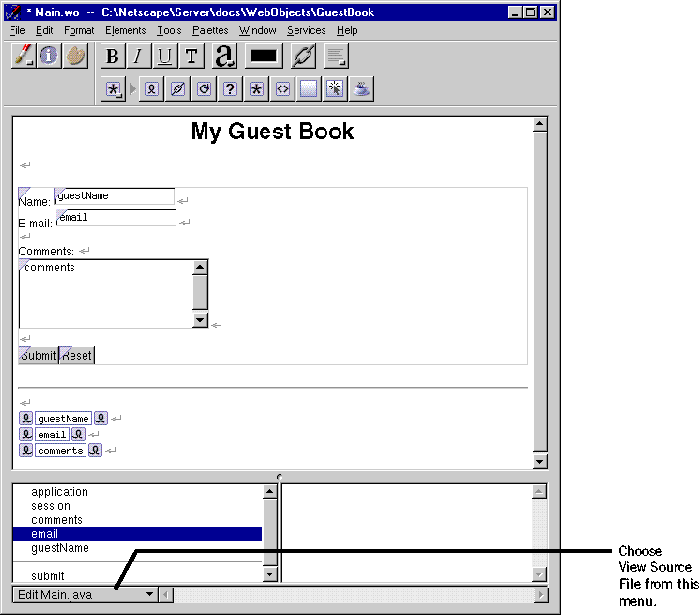
A WOString is a dynamic element whose value is determined at run time. It is shown as a small rectangle surrounded by two icons. 
Notice that the name guestName appears inside the WOString, and the Inspector window doesn't come to the front. The message "Connected guestName to value" appears in the upper-right corner of the window.
WebObjects provides this shortcut for binding to the value attribute of WOStrings, because it is the attribute you most often want to bind. The value attribute signifies the string that will be displayed when the page is drawn. If you want to bind a different attribute, you drag-connect to the left or right icon, and the Inspector appears as usual.
Note that it isn't necessary to resize the WOStrings as you did with the text fields. They expand at run time to display the value of the variables to which they are bound.
Now you are ready to test your application.
Table of Contents  Next Section