Retired Document
Important: OpenCL was deprecated in macOS 10.14. To create high-performance code on GPUs, use the Metal framework instead. See Metal.
Autovectorizer
GPUs process scalar data efficiently, but a CPU needs vectorized data to keep it fully busy. Which means that, either you write a different kernel for every device your application might run on, each optimized for that device, or application performance will suffer.
The autovectorizer detects operations in a scalar program that can be run in parallel and converts them into vector operations that can be handled efficiently by today's CPUs. If you know you will be running your code through the autovectorizer, you can write a single, simple scalar program knowing that the autovectorizer will vectorize that code for you so that its performance on the CPU is maximized while the same code runs on the GPU as written.
What the Autovectorizer Does
Achieves performance improvements of up to the vector width of the CPU without additional effort on your part.
Allows you to write one kernel that runs efficiently on the CPU or GPU.
Packs work items together into vector instructions.
-
Generates a loop over the entire workgroup.
Runs by default whenever compiling kernels to a CPU.
Workgroup size can be increased if autovectorization is successful.
Runs by default when compiling to the CPU.
Writing Optimal Code For the CPU
To write code that can best be optimized by the autovectorizer:
Do
-
Write a single kernel that can run on the CPU and GPU. Use appropriate data types (scalar or float) as needed by your algorithm.
Move memory access out of control flow if possible; for example:
if (condition)
a[index] = 1
else
a[index] = 2
should be coded as:
if (condition)
tmp = 1;
else
tmp = 2;
a[index] = tmp;
When accessing array elements, it is best to access consecutive array elements in consecutive work-items. See Table 14-2 for a real-world example of how to access consecutive array elements in consecutive work-items most efficiently.
Don’t
-
Write device-specific optimizations.
-
Write work item ID-dependent control flow, if possible. (If this occurs in many places in the code, it would likely prevent autovectorization from succeeding.)
Enabling and Disabling the Autovectorizer In Xcode
You can disable or re-enable autovectorization in the Xcode build settings for your OpenCL apps. By default, the autovectorizer is enabled when you generate kernels in Xcode. Choose No to turn the autovectorizer off. This setting takes effect only for the CPU.
|
Setting |
Type |
Default |
Command Line Flag |
|---|---|---|---|
|
Auto-vectorizer |
Boolean |
|
To enable:
To disable: |
Example: Autovectorization of Scalar Floats
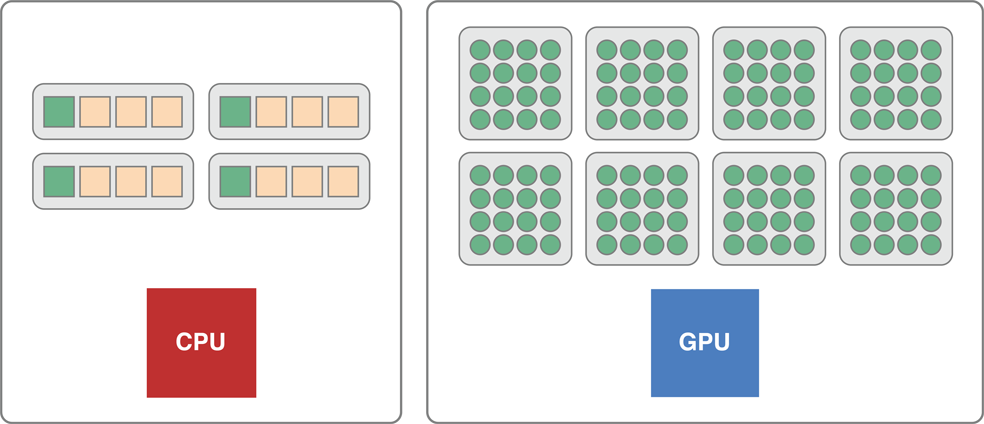
OpenCL sees devices as having a number of compute cores and within them a number of processing elements. When scalar code runs on a CPU, it runs on each core but does not take advantage of the entire vector unit.
For example, on an SSE4 CPU, scalar code runs in one lane of the vector unit when it could be running in four lanes. The monitor would report that the CPU is completely busy because all the cores are running, but the CPU is actually only using a quarter of its vector width.
Listing 13-1 is an example of a kernel that accepts simple floats:
Listing 13-1 Passing single floats into a kernel
kernel void add_arrays(global float* a, global float* b, global float* c) |
{ |
size_t i = get_global_id(0); |
c[i] = a[i] + b[i]; |
} |
If you pass simple floats into a kernel, the kernel does a scalar addition; operating on one data element at a time. As illustrated in Figure 13-1, if you pass a scalar float to a GPU, the GPU becomes fully engaged in processing the data. If you pass this same float to a CPU, only one quarter of the vector width of the processing element in each core is used.
You could instead pass float4* parameters to the kernel, that makes the addition a vector addition. The computation is now specialized for the CPU. It would extract as much work as possible from the CPU but leave the GPU idle.
Without the autovectorizer, you would have to write multiple device-specific, non-scalar kernels, one for the CPU and one for the GPU.
Copyright © 2018 Apple Inc. All Rights Reserved. Terms of Use | Privacy Policy | Updated: 2018-06-04