-
Get to know Developer Mode
Meet Developer Mode — required on iOS 16, iPadOS 16, and watchOS 9 to install, run, and debug your apps during development. We'll show you how you to opt in to Developer Mode on your devices, and how to enable Developer Mode in your automation workflows.
Resources
Related Videos
WWDC22
-
Search this video…
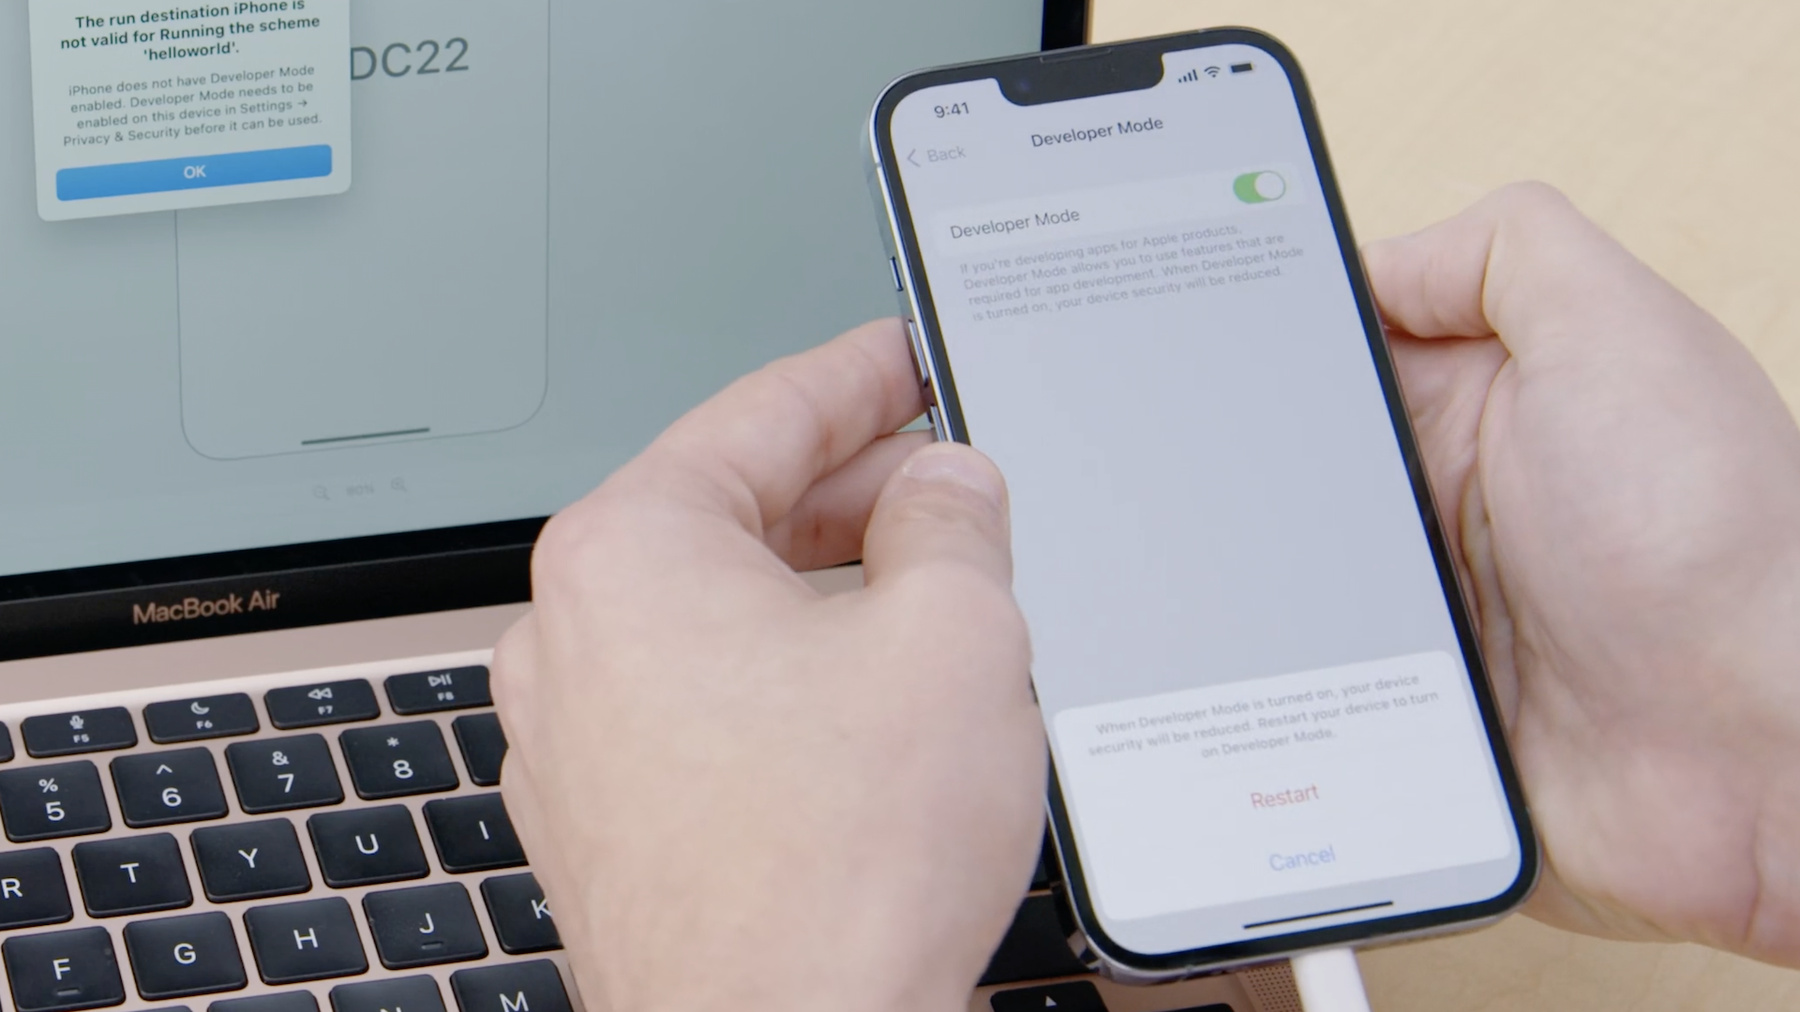
♪ Mellow instrumental hip-hop music ♪ ♪ Hi, folks. My name is Pavlo. I work on security technologies that help keep you and your users safe. Today I'm going to tell you about some upcoming changes that may impact the way you develop, test, and deploy your applications. First, I want to tell you what Developer Mode is, the reasoning behind why it was created, the security benefit it brings, and the workflows that it will affect. Then, we will discuss when and how to turn on Developer Mode. And then we will finish off this session with a walk-through of the tools we built to support automation flows for when you're working with many devices, like in a testing lab environment. OK, so what is Developer Mode? It's a new mode in iOS 16 and watchOS 9 that enables common developer workflows. Developer Mode is disabled by default and requires you to explicitly enroll the device into Developer Mode. Your enrollment persists across reboots and system updates. And of course, we have built tools that enable you to automate Developer Mode setup if you want. A natural question you will have is, "Why are we introducing Developer Mode?" The reason is that powerful developer features are being abused in targeted attacks. Meanwhile, the vast majority of users do not need such functionality and so they shouldn't be enabled by default. This way we can retain the development capabilities that you rely on and increase the security for users with mitigations that otherwise would get in your way. Now having said that, most common distribution flows will not require Developer Mode. For example, deploying your application through TestFlight or using Enterprise in-house distribution does not require Developer Mode. And of course, distributing your applications through the App Store does not require Developer Mode. It's only required for when you, the developer, are actively developing your application on your device. All right, by this point I'm sure you can't wait until I tell you how you would get started with using Developer Mode. So let's go through when you need to turn on Developer Mode and how to do it. You should turn Developer Mode on if you need to run and install development signed applications, including applications signed by using a Personal Team; debug and instrument your applications; or you want to use testing automation on your device. Turning on Developer Mode is straightforward, but first you need to connect your device to Xcode for the Developer Mode menu item to appear. The beta releases that you have downloaded will have the menu item always visible for the time being. Installing a development-signed application without Xcode, like through Apple Configurator, will also make the menu item visible. Once you've done that, you can find the Developer Mode controls under Privacy & Security in Settings. And for automation, you can use the new devmodectl that ships by default on macOS Ventura, but more on that later. OK, so let's walk through with how you would turn on Developer Mode. In front of me, I have an iPhone 13 Pro that I just picked up to run my code on. First, I'm going to plug it in to my Mac that has Xcode already running. As you can see, Xcode recognizes that this device does not have Developer Mode enabled and will prevent me from running this application. But now that I have plugged it in, I can go into Settings, Privacy & Security, Developer Mode.
Turning on Developer Mode requires that you reboot your device, so let's go ahead and do that.
Once the device has rebooted, you will be prompted once again to confirm your decision. Once you tap Turn On, you will be good to go. Now, Xcode sees that the device has Developer Mode enabled, and I can run my application.
While this flow works when you're working with a single device, this process can be time consuming if you're dealing with multiple devices. For this reason, we've built tools that help you automate this process. Automation flows have one limitation: only devices without a passcode can have Developer Mode automatically enabled. This is because when you restart your iPhone you need to unlock your device before your device can be interacted with. To support automation, macOS Ventura ships with devmodectl that you can use to either enable Developer Mode on a single device that you have already connected, or in Streaming Mode that will automatically turn on Developer Mode on all devices that you plug in.
Here I have two devices plugged into my Mac.
They don't have passcodes, and I don't want to manually set up Developer Mode on them. So I'm going to run devmodectl with the streaming subcommand. This will automatically reboot the connected devices and set up Developer Mode. Once Developer Mode has been set up, you will get a notification on the device.
And now these devices are good to go. All right, that's all I have for you today. To wrap it up, in iOS 16 and watchOS 9 you will have to enable Developer Mode to perform common development activities like deploying and debugging your applications. And if you need to automate Developer Mode setup, you can use devmodectl, which ships in macOS Ventura. If you want to learn more about security changes that may impact your macOS distribution workflows, check out the "What's new in notarization for Mac apps" talk. I hope you have a great rest of your day and happy coding! ♪
-
-
4:50 - Set up developer mode on multiple devices
devmodectl streaming
-