-
Make your game great with touch
Dive deeper into the techniques you can use to create compelling touch experiences for your games. We'll share expert insights from indie to AAA game development, explore best practices for intuitive touch controls, and show you how to take advantage of Apple technologies like Touch Controller framework and Metal for great performance.
Chapters
- 0:00 - Introduction
- 1:42 - Set up a touch controller
- 4:52 - Design flexible layouts
- 10:17 - Design fluid interactions
- 21:16 - Provide rich feedback
- 23:49 - Next steps
Resources
Related Videos
Meet with Apple
-
Search this video…
Hi! I'm Keyi Yu from the Game Technology team.
Porting your game from Mac to iOS is incredibly straightforward, with help from the Game Porting Toolkit 4. Players can already use a wide range of game controllers across Apple devices — Mac, iPad, and iPhone.
Players love taking their favorite games with them everywhere. They'll pull out their iPhone and jump into your game anywhere, anytime.
But in those spontaneous moments, they may not always have a controller with them. So how do you make sure they still get a fantastic, responsive experience? The answer is to give your game great touch controls.
Dredge, by Black Salt Games, is a perfect example of how touch controls can elevate an already engaging experience. Players get a seamless blend of gameplay and platform interaction. Everything feels natural and intuitive, letting players focus on the adventure.
I'll walk you through, step by step, how to design and implement great touch controls on iOS and iPadOS, using my game as an example.
Here's the plan: I'll set up touch controls for my game, create flexible layouts, design fluid interactions on screen, and provide rich feedback to the player.
The first step is to set up the touch controller. If your game already has support for game controllers, or has keyboard and mouse support, chances are you're familiar with the Game Controller framework.
Building on top of that, the Touch Controller framework extends that support to touch input.
The core of the Game Controller framework is straightforward.
It reacts to notifications when GCController objects connect or disconnect, and then either polls active devices for their input state, or sets up value-changed handlers to be notified when input state changes.
And once you've implemented your game logic using GCController, you're ready to add touch controls on top of it, using the Touch Controller framework.
The Touch Controller framework includes a rich set of button types and behaviors to support the most common game inputs.
On top of that, each button's appearance can be customized to best fit your game.
And the API integrates directly with Metal to ensure the highest possible performance.
When Touch Controller is enabled in your game, it shows up as a GCController object.
So you can poll its state, or set up handlers to listen for input updates, just like any other controller.
Here's my game. It already has game controller support, so now I'll add support for touch controls.
I'll start by creating a touch controller object from a descriptor. Then, I'll enable the touch controller. This automatically enables game controller logic.
With the touch controller enabled, I'll work on 2 things.
First, in UIView, I'll add a handler for touch input. This notifies the touch controller when players start, end, and move the touch.
Second, in the Metal renderer, I render the touch controls on screen.
In the code, I'll use a descriptor to create a touch controller object.
I'll enable the touchController using the connect API.
Then, I'll render all the controls using the touchController's render API.
In UIKit, the touchesBegan function reports when one or more new touches occurred in a view or window. I'll override that, and call handleTouchBegan instead. You'll want to do that for touchesEnd and touchesMove also.
Finally, I'll set up the polling states and valueChangedHandler.
There's one more thing I still need to do: add all the controls to the touch controller object.
But where should I place them? And how can I do it in a way that gives players the best experience? The key is setting up a flexible layout.
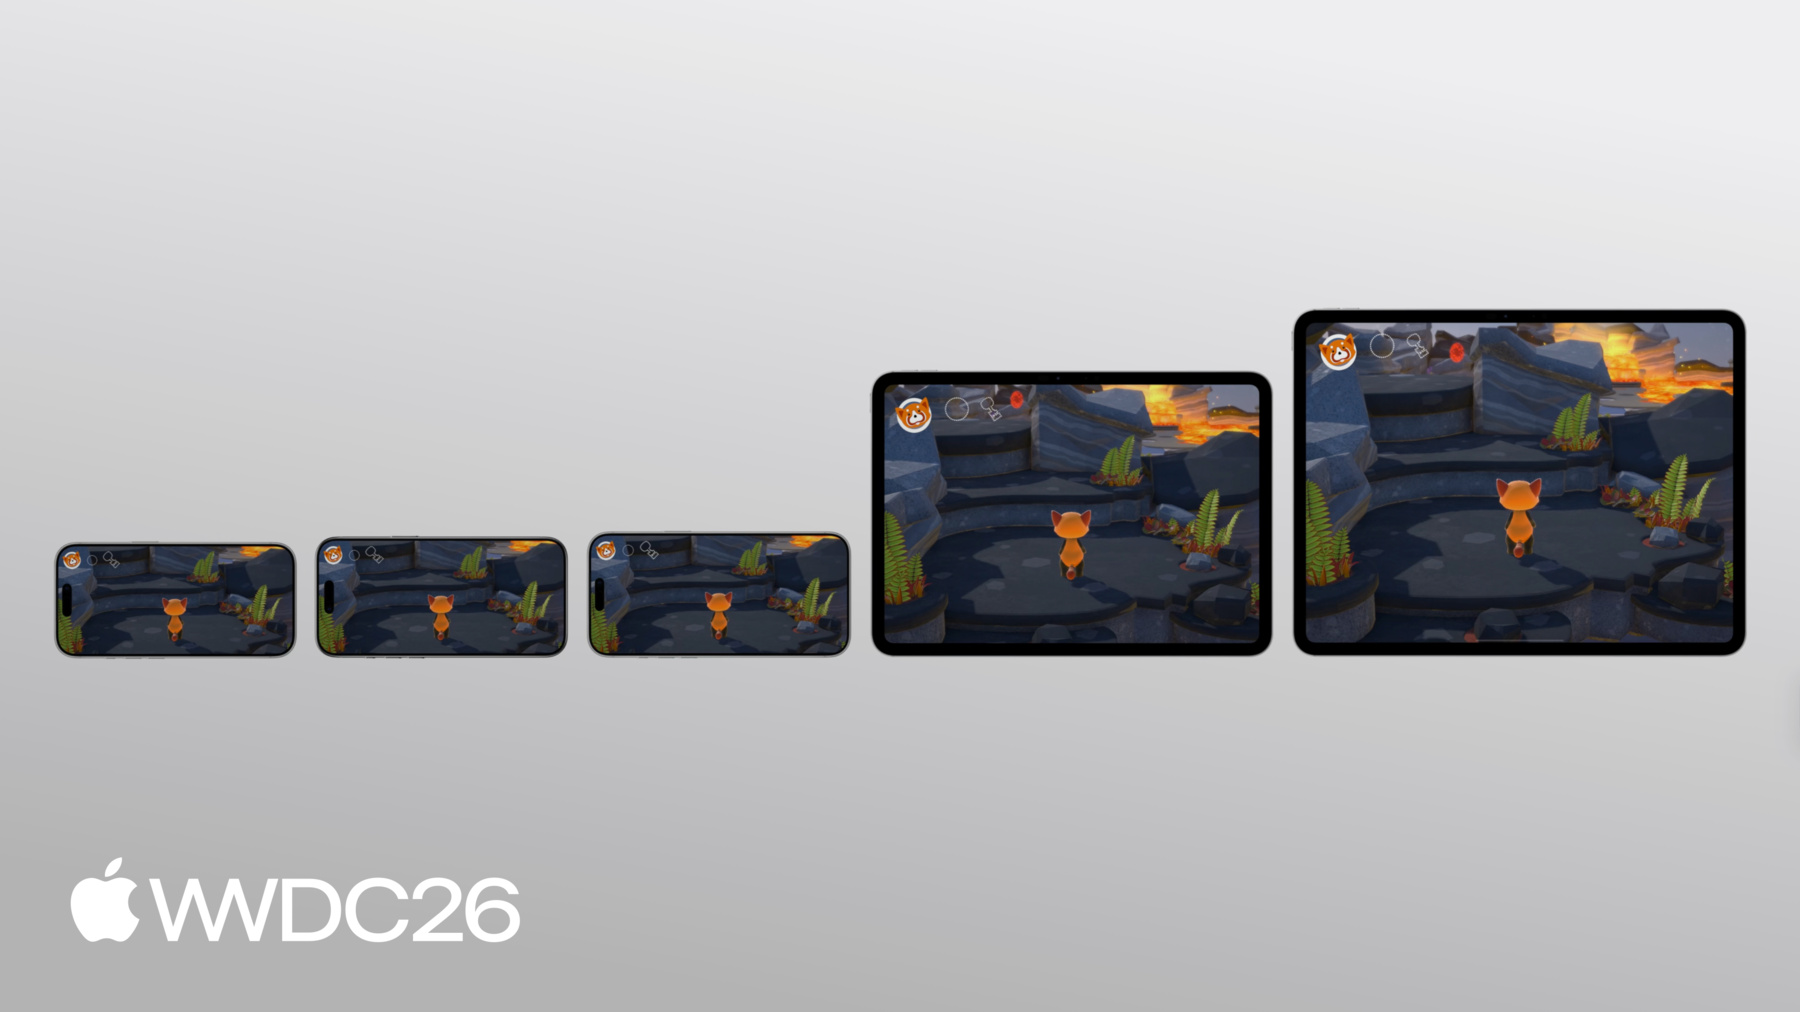
A flexible layout means your game feels comfortable on any screen size.
With Apple's unified gaming platform, players can find your game across a wide variety of devices. The key is to plan early, and design an adaptive game interface that scales gracefully across all of them. The Touch Controller framework makes it easy to do that.
It provides nine anchor points for each layout. After you assign the anchor for a control, you can place it with an offset which is relative to the anchor.
You can group related controls into a section and assign the same anchor point to every control in that section. Then, as the device shape changes, each section stays at a consistent size and distance from its anchor point.
This keeps your controls at physically comfortable sizes for mobile players, while making the best use of available screen space across all devices.
You'll also want to make sure your controls are always visible. The way to do that is to design for the fullscreen.
On iPad and iPhone, designing a fullscreen gaming experience means keeping the safe areas in mind.
Safe areas are regions of the display where you can safely put UI so that it doesn't overlap with hardware or software features. On iPad and iPhone, safe areas help you avoid placing UI where the device's rounded corners could obscure it. They also help you steer clear of the system home indicator and the Dynamic Island on iPhone, both of which can potentially overlap your controls' tap targets.
On iOS and iPadOS, you can read the safeAreaInsets from any UIView in UIKit. Then you can add the safeAreaInsets to the offset of the controls you want to place on the screen.
Avoiding the safe areas is a start. But I also need to place my controls carefully so they don't interfere with the game's play area.
I want to avoid placing controls where I expect movement or camera input to happen.
And of course, I don't want to cover my character, so no controls will go in the center of the display. That leaves the regions near the thumbs, which are ideal for frequent or important actions, and the region at the top of the screen, which is a great place to put less frequently used controls like menu buttons. With that, I know exactly where to place my touch controls. Now, I'll implement these controls in my game using the touch controller I set up earlier. The Touch Controller framework provides convenient APIs to create controls. And they all follow a similar pattern.
Set up the relevant properties for the control using a descriptor. Some controls have properties in common. Some properties are unique to a specific type of control. Then, using the descriptor, create a control. Add it to the TCTouchController.
For my game, I'll need to implement these controls to match my controller support. I'll start with creating button B.
Here I'll create a standard circular button B. First, I initialize a TCButtonDescriptor. I set its label to TCControlLabel.buttonB. This maps it to the physical buttonB on a game controller.
Since my game was already handling the input from a physical controller, I don't have to write any more game logic here. It's already handled! I just have to place the button on screen. I anchor it in the bottomRight region, and set a fixed offset.
I also need to set the button's visual contents so it actually appears on screen. Finally, I call addButton on the touchController and pass this descriptor.
And since my game is fullscreen, I'll adjust the offset using safeAreaInsets so nothing gets clipped.
Button B is showing up at the bottom right in a circular shape. All the other controls follow a similar pattern. After I add all the controls into the touch controller object, they are appearing in the game.
Because I applied safe areas to the offsets, the Dynamic Island doesn't overlap any of my controls. The controls also don't cover the main character, keeping the game area clean.
But these controls don't feel quite right. I've created a direct one-to-one mapping from a physical controller. This makes the screen cluttered with controls that compete for space. But I can improve on that.
In this section, I'll clean up the clutter and design controls that feel native to touch because when interactions feel fluid and natural, players feel immersed in the gaming experience.
There are a few choices you can make here that really make a difference. I'll start with using dynamic controls. Unlike a physical game controller button, you can easily change the appearance of on screen controls.
You can choose a glyph that actually represents what the control's function is. Since I'm using system assets for my controls, I'll just change the name of the system assets from buttonB to instead display an icon showing the actual action.
Now, the button B displays the icon for the strike action.
After swapping out all the system assets the layout is much more intuitive. Players immediately know what each control does without having to check the settings or read hints during gameplay.
And when a control's behavior changes based on context, you should update its icon to match.
In my game, besides the default strike power, the single button B can also represent the fireball or water power. So the icon should update with the flame or water drop image when players select the power.
I'll create a helper function that updates the contents of button B. Then, in the cyclePower function, I'll call it with the right symbolName for each power type. This shows the players exactly what action they are playing with.
Now, once a player selects their power, button B on the bottom right automatically shows the correct icon for that power.
And importantly, when an action isn't available or relevant, remove it from the screen entirely. Don't leave controls visible that players can not use. In my game, here's how I apply this.
Thumbsticks are hidden when they're not being touched. The pick-up button only appears when there's an item nearby to pick up.
And quick time event buttons are only shown when a quick time event is actually happening.
The aim and release power button should only appear when a specific power is selected.
Hiding thumbsticks when not in use is easy. When you create the thumbstick, just set hidesWhenNotPressed to true.
For other controls like buttons, set isEnabled to false to hide them.
The pickup button is a little different. It should appear right next to the item that needs picking up. So I update its position every time I show it.
When it's time to dismiss it, I remove the button from the touchController entirely.
After hiding the thumbsticks, pickup button, and quick time event buttons when they're not needed, the screen is much cleaner.
One of the real advantages of touch controls is that they can serve as both input and output. So instead of showing an overlay and cycling through actions, you can display those actions directly as touch controls.
In the buttonX press handler, I'll open the power wheel controls directly instead of showing the power wheel overlay.
In the openPowerWheel function, I add each power control to the touch controller based on what powers are currently available.
Then, I set a value-changed handler for each one.
And since these controls are not used all the time, I auto-dismiss them after three seconds if no selection is made.
Now players can select a power directly from the touch controls. No overlay is needed! Smooth character and camera movement are essential for a great-feeling game. So how do you adapt those from a physical controller to touch? I'll use the fullscreen for both character and camera movement. For sprinting, I'll use a single left thumbstick without an extra button.
I'll also replace the right thumbstick with a touchpad.
Physical thumbsticks have a fixed size. But on touch screen, you're not bound by those constraints at all.
And because players can't physically feel where their finger is relative to a visual control, it's important to expand the input area as much as possible.
I'll set the colliderShape to either leftSide or rightSide, which gives the thumbstick access to the entire half of the screen for touch detection.
Now, the entire left half of the screen responds to the player's touch.
Let's look at another issue I want to address: when the character is sprinting.
In my game, sprinting requires players to hold down the left thumbstick and move it at the same time. On a physical controller that's fine, but on touch, it means using at least two fingers simultaneously. This is really difficult to do.
To solve this, I'll embed the thumbstick button's functionality directly into the thumbstick itself. And I'll use the tilt magnitude to determine sprint.
A small tilt means the character moves at a normal pace.
If it's a big tilt, the character will sprint.
In the pollInput() function, I read the leftThumbstick from GCController and get the tilt value from it.
Then I do a quick magnitude check to decide whether the tilt is large enough to trigger sprinting. Now players can sprint using just the thumbstick. No second finger is required! Another issue I want to solve is the camera control.
Directly mapping the right thumbstick to camera movement on touch can cause over-rotation, and can feel sluggish. A touchpad gives you both speed and precision. The camera moves immediately. The player doesn't have to wait for it to spin around. It moves exactly as far as their finger moves, with no latency or drift at the start or end of a gesture.
The Touch Controller framework provides TCTouchpad for this. I initialize the descriptor, set its label to rightThumbstick so it maps to the existing camera logic, set colliderShape to rightSide so it covers the right half of the screen, and set reportsRelativeValues to true so it works no matter where on the screen the player touches. Then I add it to the touchController. Now, when players use the touchpad to control the camera, there's no visible control to clutter the screen. This leaves more room for the game itself. And there's no over-rotation when they move their fingers. Most modern games have some complex control combinations that are fine on a physical controller, but need rethinking for touch.
It's important to approach those thoughtfully.
In my game, there are two cases worth working through. A quick time event and an aim-to-release power.
These events usually require using two or more fingers at once on a physical controller, but on touch there are better ways.
I'll start with the quick time event. One quick time event happens when the big boss freezes your character. Players need to hold L1 and R1 to break free, while also using the left thumbstick to move away from the boss.
That's a lot to manage with just two fingers! Instead, consider collapsing those two buttons into a single quick time event button. And hide it entirely when the event isn't happening.
In my game, I add this quick time event button once during setup. Unlike the pickup button, which appears at different positions, the quick time event button always appears in the same spot. So I use isEnabled to show and hide the button instead of adding and removing it each time.
Now players can hold the quick time event button to escape while moving with the left thumbstick at the same time.
The other challenge is aiming to use a power. This is a common event in modern games. To throw a fireball, players need to use more than two fingers to aim, move and release power at the same time. That's very challenging in a busy game. The fix is to combine the aim and release into a single action button.
In code, I'll remove the aim and release buttons. Instead, in buttonB's valueChangedHandler, I'll call the releasePower function based on this pressed state. To implement hold and drag, capture the raw touch delta while button B is held. This has to happen in touchesMoved because it's tracked independently from the button's pressed state itself. Now, if a player wants to throw a fireball, they hold button B and drag to aim, while still moving with the left thumbstick. When they release button B, the fireball fires.
The interaction feels much smoother with this redesign.
Now that players can touch anywhere on screen, it's just as important to give them clear feedback about what they're touching. Every touch control you create should have a visible pressed state. And the Touch Controller framework handles this for you by default. Thumbsticks animate as they move and the buttons highlight when pressed. But in the context of a visually busy game, you may want to go further with custom visual feedback.
In my game, players don't get much feedback when they're sprinting. I'll fix that with a strong visual indicator. I'll add a glowing halo around the outer ring of the left thumbstick when sprint is active. To do this, I create TCControlContents manually. First, I generate the halo ring TCControlImage from a halo Metal texture. It's sized slightly larger than the thumbstick background.
TCControlContents is essentially an array of layers. I stack the halo control image on top of the standard background images. Then, I swap in the new TCControlContents with the halo when sprint is active, and revert to the normal background when it's not. Now, when a player is sprinting, the glowing halo around the thumbstick makes it immediately clear the character is in sprint mode.
Great! So far, I've set up a touch controller, redesigned my controls and implemented the design with Touch Controller framework in my game. Let's check how it works in the game overall! This is where I started. Every button from a physical controller mapped directly onto the screen, cluttering the game.
With all the improvements I went through in today's session, the game view is clear and controls are straightforward to use. The left thumbstick appears when players touch the screen. The pickup button shows up when there's an item nearby to pick up. The right half screen is the touchpad for camera control without over rotation. Simply press the button to pick a power that players just picked up. Hold and drag one single action button to aim and release.
The sprint indicator enhances the gameplay a lot! Players can jump into my game with only two fingers anywhere, anytime.
It's your turn to design touch controls. When done well, they can make your game feel brand new to players who pick it up on their phone. And implement those great controls with the Touch Controller framework. For more, watch "Design great interfaces for handheld games" and "Level up with Apple game technologies." Thanks so much for watching!
-
-
2:04 - GCController polling vs. change handlers
// Polling if (button.isPressed) { // ... } // Change handlers pressedInput.pressedDidChangeHandler = { (element: any GCPhysicalInputElement, input: any GCPressedStateInput, pressed: Bool) // ... } -
3:14 - Set up a TCTouchController
// Set up a TCTouchController private(set) var touchController: TCTouchController? let descriptor = TCTouchControllerDescriptor(mtkView: mtkView) if TCTouchController.isSupported { touchController = TCTouchController(descriptor: descriptor) } touchController?.connect() touchController?.render(using: renderEncoder) override func touchesBegan(_ touches: Set<UITouch>, with event: UIEvent?) { for touch in touches { touchControls.handleTouchBegan(at: touch.location(in: view), index: touch.hash) } } buttonA?.valueChangedHandler = { (_ button: GCControllerButtonInput, _ value: Float, _ pressed: Bool) in // ... } -
8:33 - Create a standard circular button B
// Create a standard circular button B let buttonBDesc = TCButtonDescriptor() buttonBDesc.label = TCControlLabel.buttonB buttonBDesc.anchor = .bottomRight buttonBDesc.offset = adjustedOffset(CGPoint(x: -35, y: -106), for: buttonBDesc.anchor) buttonBDesc.contents = .buttonContents(forSystemImageNamed: "b.circle", size: buttonBDesc.size, shape: .circle, controller: touchController) // Set other properties ... touchController.addButton(descriptor: buttonBDesc) func adjustedOffset(_ offset: CGPoint, for anchor: TCControlLayoutAnchor) -> CGPoint { // Adjust offset for other anchors ... case .bottomRight: x -= safeArea.right y -= safeArea.bottom } -
10:48 - Change icon image
// Change icon image buttonBDesc.contents = .buttonContents(forSystemImageNamed: "figure.fencing", size: buttonBDesc.size, shape: .circle, controller: touchController) -
11:51 - Update contents for button B based on context
// Update contents for button B based on context func setButtonBContents(symbolName: String) { for button in touchController.buttons { if button.label == TCControlLabel.buttonB { button.contents = .buttonContents(forSystemImageNamed: symbolName, size: buttonSize, shape: .circle, controller: touchController) } } } func cyclePower() { // Get the current power type ... switch currentPower { case .strike: touchControls?.setButtonBContents(symbolName: "figure.fencing") case .fireball: touchControls?.setButtonBContents(symbolName: "flame.fill") case .waterBlaster: touchControls?.setButtonBContents(symbolName: "drop.fill") } } -
13:01 - Hide left thumbstick when not touched
// Hide left thumbstick when it is not touched let leftStickDesc = TCThumbstickDescriptor() leftStickDesc.hidesWhenNotPressed = true // Set other properties ... touchController.addThumbstick(descriptor: leftStickDesc) -
13:19 - Show/hide the pick-up button
// Show pickup button when there's an item nearby func showPickupButton(at projectedPosition: CGPoint) { // Calculate the position(ptX, ptY) for pickup button ... descriptor.offset = CGPoint(x: ptX, y: ptY) // Set other properties ... touchController.addButton(descriptor: descriptor) } func hidePickupButton() { for button in touchController.buttons { if button.label == TCControlLabel.buttonY { touchController.removeControl(button) } } } -
13:56 - Show power options as touch controls
// Show power options as touch controls buttonX?.pressedChangedHandler = { (_ button: GCControllerButtonInput, _ value: Float, _ pressed: Bool) -> Void in if pressed { self.openPowerWheel() } } func openPowerWheel() { touchControls?.showPowerWheelButtons(fireballCount: fireballCount, has: hasWaterBlaster) wirePowerWheelHandlers() DispatchQueue.main.asyncAfter(deadline: .now() + 3.0) { [weak self] in guard let self = self, self.powerWheelActive else { return } self.closePowerWheel() } } -
15:34 - Use the left half of the screen for character movement
// Use the left half of the screen for character movement let leftStickDesc = TCThumbstickDescriptor() leftStickDesc.colliderShape = .leftSide // Don't set as .circle // Set other properties ... touchController.addThumbstick(descriptor: leftStickDesc) -
16:39 - Calculate thumbstick tilt magnitude to trigger sprint
// Calculate left thumbstick's tilt magnitude to trigger sprint func pollInput() { if let gamePad = gameController.extendedGamepad { let gamePadLeft = gamePad.leftThumbstick var moveInput = simd_make_float2(gamePadLeft.xAxis.value, -gamePadLeft.yAxis.value) let magnitude = simd_length(moveInput) if magnitude > 0.8 { self.runModifier = 1.3 } self.characterDirection = moveInput } } -
17:36 - Replace right thumbstick with a touchpad
// Replace right thumbstick with touchpad let touchpadDesc = TCTouchpadDescriptor() touchpadDesc.label = TCControlLabel.rightThumbstick touchpadDesc.colliderShape = .rightSide touchpadDesc.reportsRelativeValues = true // Set other properties ... touchController.addTouchpad(descriptor: touchpadDesc) -
19:30 - Collapse two QTE buttons into one
// Collapse 2 QTE buttons into 1 single button func setupControls() { let desc = TCButtonDescriptor() desc.label = TCControlLabel(name: "escape_button", role: .button) // Set up other properties ... touchController.addButton(descriptor: desc) } func showEscapeButton() { // Find escape button in touchController ... escapeButton.isEnabled = true } func hideEscapeButton() { // Find escape button in touchController ... escapeButton.isEnabled = false } -
20:28 - Use button B to aim, move, and release power
// Use button B to aim, move, and release power buttonB?.valueChangedHandler = { (_ button: GCControllerButtonInput, _ value: Float, _ pressed: Bool) -> Void in self.releasePower(pressed: pressed) } override func touchesMoved(_ touches: Set<UITouch>, with event: UIEvent?) { for touch in touches { let point = touch.location(in: metalView) // Handle touch input ... if let gc = gameController, gc.isAiming { let prev = touch.previousLocation(in: metalView) gc.aimTouchDelta += simd_float2(Float(point.x - prev.x), Float(point.y - prev.y)) } } } -
21:52 - Add a halo effect with custom TCControlContents
// Add a halo effect around left thumbstick with customized TCControlContents
let haloLayer = TCControlImage(texture: haloTexture, size: haloSize, highlight: nil,
                               offset: .zero, tintColor: tint)
let normalBgImages = TCControlContents.thumbstickStickBackgroundContents(size: bgSize,
                                                                         controller: controller).images
haloThumbstickBg = TCControlContents(images: [haloLayer] + normalBgImages)
thumbstick.backgroundContents = active ? haloThumbstickBg : normalThumbstickBg
-
-
- 0:00 - Introduction
An overview of why great touch controls are essential for games on iOS and iPadOS, using Dredge by Black Salt Games as an example, and a preview of the four areas covered: setup, flexible layouts, fluid interactions, and player feedback.
- 1:42 - Set up a touch controller
How the Touch Controller framework extends existing GCController support to touch input. Covers creating a TCTouchController from a descriptor, enabling it, and how it appears as a standard GCController object so existing game input code requires minimal changes.
- 4:52 - Design flexible layouts
How to place touch controls comfortably across all iOS and iPadOS screen sizes using the framework's nine anchor points and section grouping. Covers reading UIKit safe area insets and strategies for positioning controls — near thumbs for frequent actions, top of screen for less critical ones — to avoid obscuring gameplay.
- 10:17 - Design fluid interactions
How to make touch controls feel native rather than like a direct controller overlay. Covers contextual icons that reflect current game state, hiding unavailable controls, replacing complex overlays with direct touch input, full-screen thumbstick collider shapes for easier character movement, sprint detection via thumbstick tilt magnitude, and using TCTouchpad for smooth camera control.
- 21:16 - Provide rich feedback
How to give players clear feedback during touch interactions using built-in press states, custom visual effects like a glowing thumbstick halo during sprint, and strategies for simplifying complex multi-finger actions like QTEs and aim-to-release power throws into single, intuitive controls.
- 23:49 - Next steps
Guidance on getting started: design your touch controls with the Touch Controller framework, test on multiple device sizes, and iterate based on player feedback to make your game feel brand new on iPhone and iPad.