 Prepare your app
Compatible iPad and iPhone apps
Most iPadOS and iOS apps can run unmodified on Apple Vision Pro, so your app can easily extend to this new platform — with no additional work required. Your compatible iPad and iPhone apps will be published automatically on the App Store for Apple Vision Pro, using the metadata you’ve already provided. You can edit your app’s availability at any time in App Store Connect.
Check whether your existing app is compatible with visionOS
Apps made for visionOS
Take advantage of the visionOS SDK in the latest version of Xcode to build new spatial computing experiences for Apple Vision Pro. To learn how to build an app or game that takes advantage of the unique and immersive capabilities of visionOS, view our design and development resources.
When you update your existing project for visionOS, the user interface of your app takes on the standard visionOS system appearance and you can add platform-specific capabilities. In most cases, you’ll only need to update your Xcode project’s settings and recompile your code.
Test your app
Make sure your apps work as expected on the latest release by testing on device or in the Simulator. You can submit a request to have your app evaluated directly on Apple Vision Pro by Apple after reviewing the compatibility checklist.
About universal purchase
With universal purchase, people can discover and enjoy your app across their Apple devices with a single purchase. In-app purchases and subscriptions can also easily be set up and shared across platforms.
Your product page will show the other platforms your app supports along with screenshots. And you’ll be able to promote your app using a single URL across your marketing channels.
If you’d prefer to offer your visionOS app as a separate paid app, simply set up as a new app record in App Store Connect.
Learn about offering universal purchase
 Create your product page
Your product page helps people understand what to expect from your app — and why they should download it.
When creating your product page, consult section 2.3 of the App Review Guidelines and accurately represent your app experience. Remember that you’re responsible for securing the content rights for all materials, and that any displayed account information or user data must be fictional.
 Screenshots and app previews
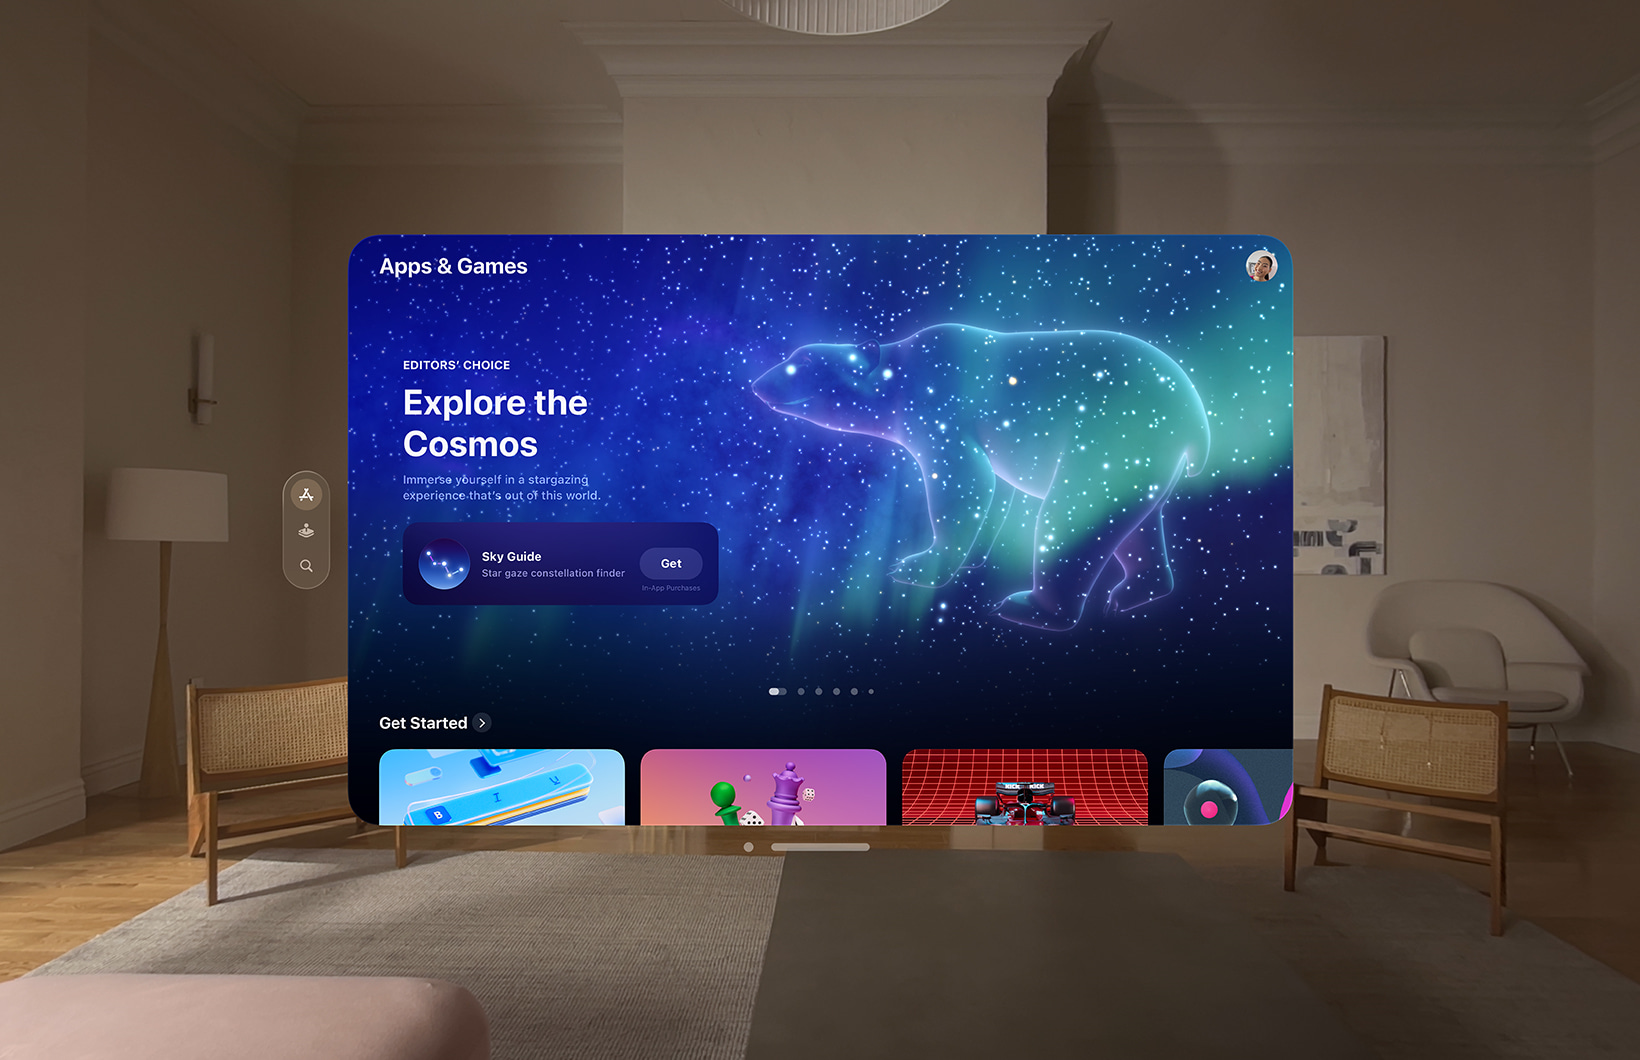
Screenshots and app previews are key to conveying your app experience to potential users. Focus on creating high-quality screenshots that make good use of the app’s surroundings.
Quality
- To capture high-quality screenshots and app previews, use the Developer Capture feature in Reality Composer Pro. Don’t submit screenshots or app previews captured from a screen recording initiated from Control Center, as the recording will be foveated and have limited resolution. Learn more about capturing screenshots and video from Apple Vision Pro for 2D viewing.
- When capturing images or video, keep your head in a steady, fixed position. Tip: Sit with your feet flat on the floor and rest your hands on a stable surface.
- If your app experience relies heavily on hands or specific gestures, you can display a person’s hands in your screenshots or app previews, but otherwise, don’t include them. Show only key motions or gestures — for example, two hands that enlarge a 3D object to reveal additional visual detail. Make sure hand placement doesn’t obstruct any key elements of the app experience.
Surroundings
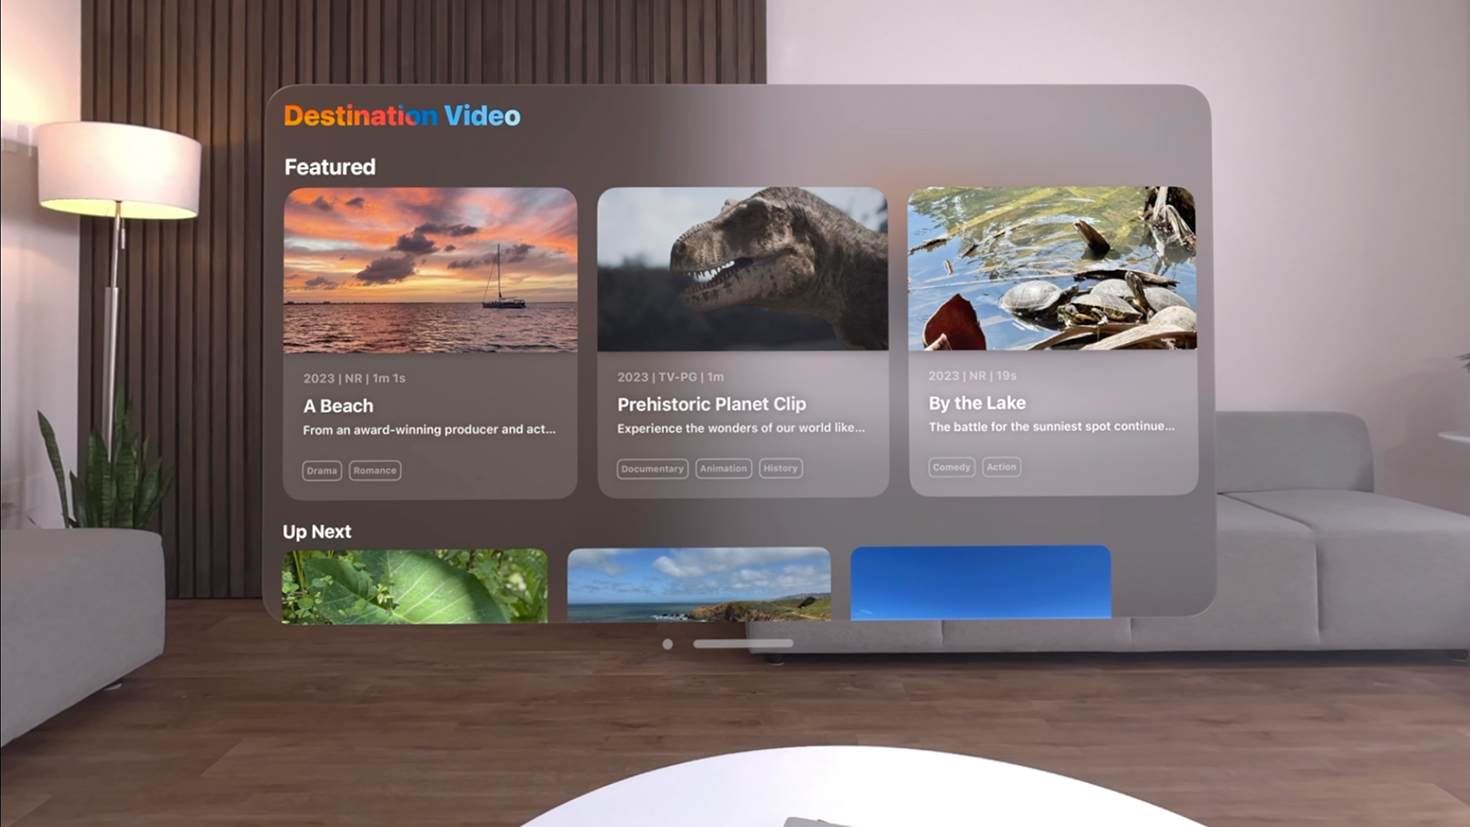
- Convey surroundings accurately. Depict your app within a user’s surroundings unless it uses a fully immersive space. This helps people understand they can use passthrough and still interact with people or objects in their physical space.
- When capturing, make sure your surroundings are uncluttered and free of any items or materials that may include sensitive content, personal information, or intellectual property. In addition, make sure your surroundings don’t distract from your app.
- If you’re unable to capture screenshots or app previews using passthrough, you may use a system Environment, though simulating capture (see below) will offer a more differentiated view of your app.
Simulating capture
You can simulate captures as long as they accurately depict your app. Use the Apple Design Templates to create simulated assets that accurately represent your app and include proper rendering effects. You can also use Simulator if needed. Before uploading screenshots captured in the Simulator to App Store Connect, you’ll need to resize and crop them to match the upload specifications.
Do
- Keep app window straight
- Depict uncluttered surroundings
- Capture clearly rendered (not foveated) images
Don’t
- Tilt or distract from your app window
- Depict cluttered surroundings
- Show foveated rendering
 App icon
On visionOS, your app icon appears as a circular 3D object that comprises a background layer and one or two additional layers. App icons can subtly expand when viewed. App icons for compatible iPadOS and iOS apps will appear as square assets with rounded corners. For more about designing your app icon for visionOS, refer to the Human Interface Guidelines.
 Describing your app
Your app name, subtitle, and description should work together to highlight the features and functionality of your app.
- App name: Choose a simple, memorable name that’s easy to spell and hints at what your app does. An app name can be up to 30 characters long and is shared across platforms.
- Subtitle: Use your subtitle to summarize your app and explain its value in greater detail. A subtitle can be up to 30 characters long and is also shared across platforms.
- Description: The ideal description is a concise, informative paragraph followed by a short list of main features. Description text is specific to your product page on Apple Vision Pro, so be sure to highlight features that are unique to visionOS.
Follow these style guidelines when writing about Apple Vision Pro and visionOS, including when marketing your app outside of the App Store.
- Apple Vision Pro: Always typeset Apple Vision Pro as three words with an uppercase A, V, and P followed by lowercase letters. Don’t break Apple Vision Pro over two lines. Don’t use the article the before Apple Vision Pro. Apple Vision Pro apps are available on the App Store or can be downloaded from the App Store. It’s acceptable to say Name of app for Apple Vision Pro when your promotion is focused on features and benefits related to Apple Vision Pro. Don’t refer to Apple Vision Pro generically as a “headset.” The phrase “Apple Vision Pro” can’t be included in your app name, but it can be included in your app description.
- visionOS: visionOS begins with a lowercase v, even when it’s the first word in a sentence.
- Spatial computing: Refer to your app as a spatial computing app. Don’t describe your app experience as augmented reality (AR), virtual reality (VR), extended reality (XR), or mixed reality (MR).
- App Store: Always typeset App Store with an uppercase A and an uppercase S followed by lowercase letters. Refer to just the App Store unless you need to be more specific; in that case, you can use the App Store for Apple Vision Pro.
Always set visionOS, Apple Vision Pro, and App Store in English, even when they appear within text in a language other than English. These terms should not be translated or transliterated.
App Store Connect requires app motion information for visionOS apps. If your app contains movement like quick turns or sudden changes in camera perspective, you’ll need to indicate this in App Store Connect so your app’s product page will show a badge informing people who may be sensitive to these experiences.
Learn about assessing your app for high motion
 Privacy labels
App Store Connect now includes additional data groupings relevant to visionOS apps: Surroundings and Body. Surroundings includes Environment Scanning, which covers mesh, planes, scene classification, and/or image detection. Body comprises Hands (a person’s hand structure and hand movement) and Head (a person’s head movement).
Be sure to include the practices of any third-party partners whose code is integrated into your app. These details inform the app privacy label that appears on your App Store product page and are required to submit new apps and app updates.
Learn about providing app privacy details
 Game controllers
Apple Vision Pro supports a maximum of two simultaneous touch events, such as taps. This means that some games designed for iPad and iPhone will need a game controller to provide a good player experience. If this is the case for your game, add the Requires Game Controller badge to your product page by using the GCRequiresControllerUserInteraction key.
Submit your app
Use App Store Connect to submit your app for review and manage availability. Be sure to follow the App Review Guidelines. Once approved by App Review, your app will be published on the App Store based on your selected availability. You can gather valuable user feedback on your app using TestFlight.
If you’ve built your app for visionOS, you can share your app and development story with us for featuring consideration on the App Store.
All visionOS apps uploaded to App Store Connect must be built with a minimum of visionOS 2 SDK.