App Store Connect Help
App Store Connect Manage your team Manage webhooks
Manage webhooks
You can optionally configure webhooks in App Store Connect to receive automatic notifications to your web server when there are updates or changes to your apps, such as:
-
The status of a build upload changes.
-
The status of a beta build changes.
-
The status of an app version changes.
-
The status of an Apple-hosted asset pack version changes.
-
New TestFlight feedback is submitted by a tester.
If you’re the developer of an alternative app marketplace, you can also configure webhooks in App Store Connect to receive automatic notifications to your web server when there are updates or changes to the apps that your marketplace distributes. Learn about recent changes to alternative distribution notifications.
To receive these notifications, implement an endpoint on your web server, or webhook.
A webhook can only apply to one app, and you can create up to ten webhooks per app.
Learn more about webhook event types and how to manage webhooks using the App Store Connect API.
Required role: Account Holder, Admin, or App Manager. View role permissions.
Create a webhook
-
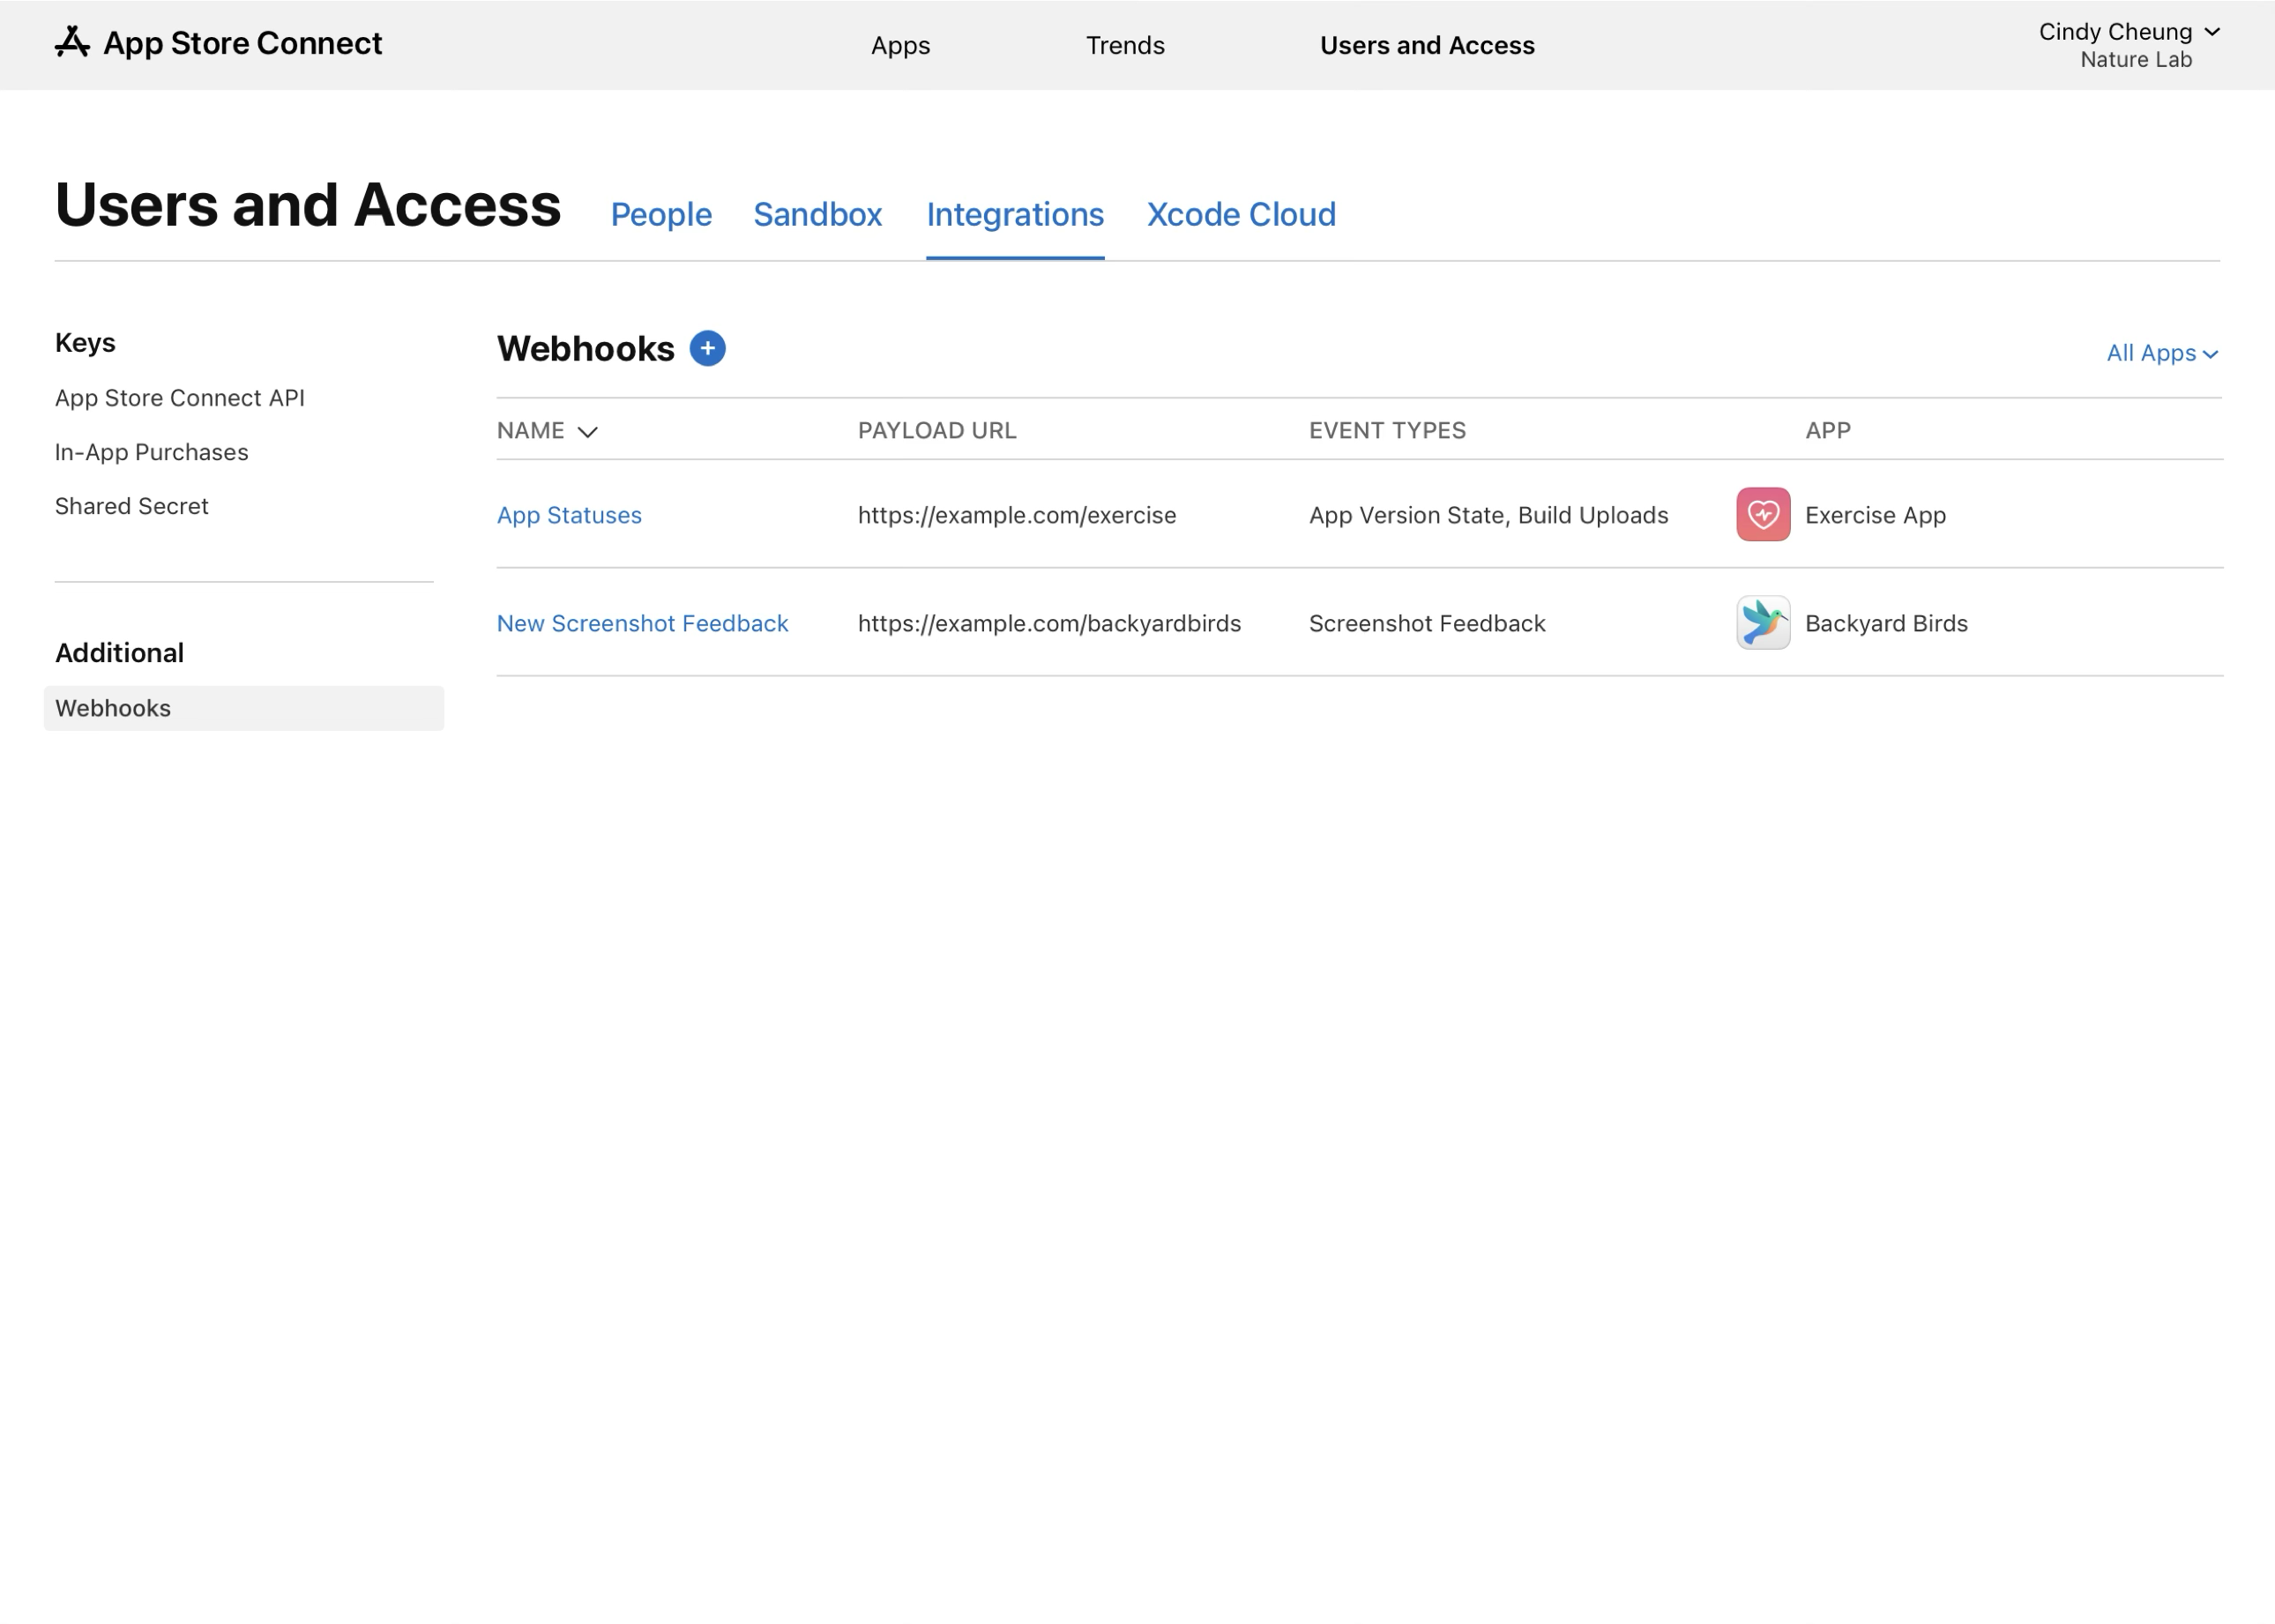
In Users and Access, click Integrations.
-
Under Additional, click Webhooks.
-
Next to Webhooks, click the add button (+).
-
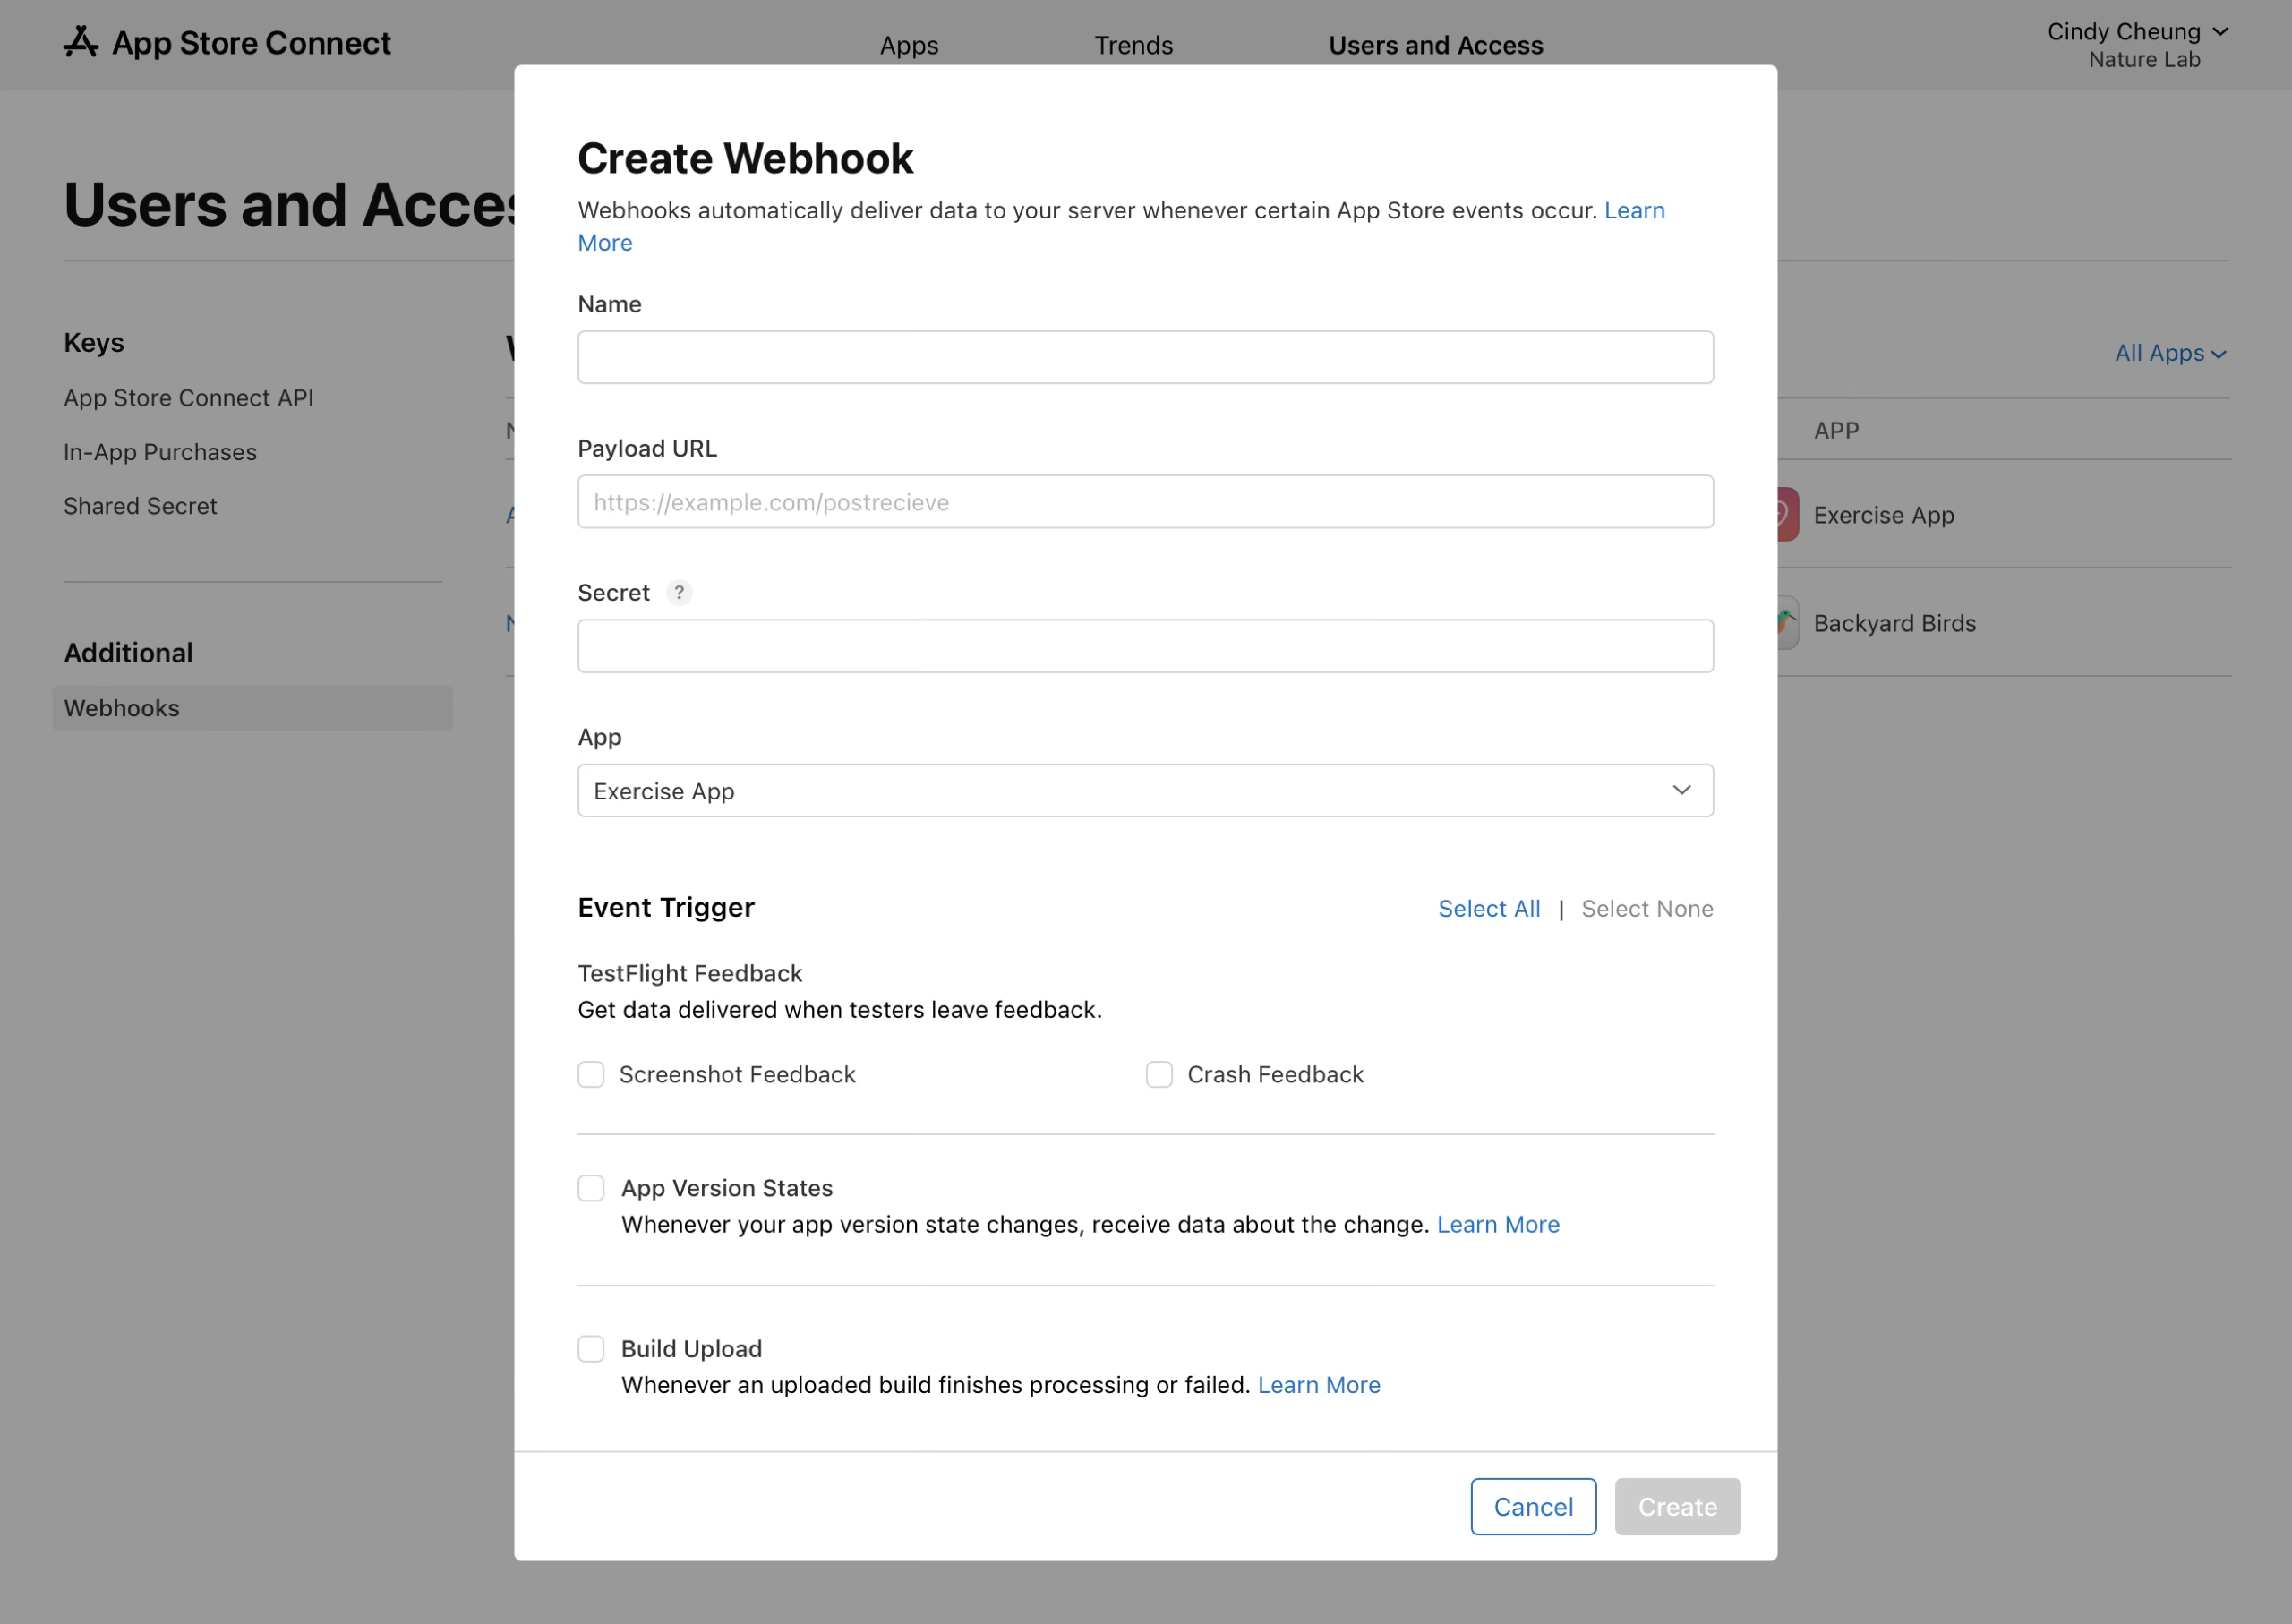
Enter a Name for your webhook.
-
Enter the Payload URL. This is the URL where you want to receive notifications.
-
Enter a Secret. The string of text you define here is used by your server to verify that a webhook delivery is from App Store Connect and authentic.
-
Select the app you want to receive notifications for.
-
Select at least one event trigger that you want to receive notifications for.
Note: Alternative app marketplace event triggers are only visible if you select a marketplace app.
-
Click Add.
Test webhook delivery
-
In Users and Access, click Integrations.
-
Under Additional, click Webhooks.
-
In the table on the right, click the webhook you want to test.
-
In the top right corner of the page, click Test.
A test webhook delivery will be sent to your server. It will appear under the Recent Deliveries table with the Ping event trigger.
Manage webhook details
You can edit the name, secret, payload URL, and event triggers associated with a webhook at any time. You can’t change the app associated with an existing webhook. Instead, you must create a new webhook for that app.
-
In Users and Access, click Integrations.
-
Under Additional, click Webhooks.
-
In the table on the right, click the webhook you want to modify.
-
Make your desired changes, then click Save.
Changes will go into effect immediately.
Turn off a webhook
Turn off a webhook to temporarily stop notifications from being delivered. When you’re ready, follow the same steps to turn it on again.
-
In Users and Access, click Integrations.
-
Under Additional, click Webhooks.
-
In the table on the right, click the webhook you want to modify.
-
Click Turn Off Webhook. If you're re-enabling a webhook, click Turn On Webhook.
-
Click Confirm.
Delete a webhook
Delete a webhook to permanently remove it from App Store Connect. This action cannot be reversed.
-
In Users and Access, click Integrations.
-
Under Additional, click Webhooks.
-
In the table on the right, click the webhook you want to modify.
-
Click Delete Webhook.
-
Click Confirm.
View recent webhook deliveries
-
In Users and Access, click Integrations.
-
Under Additional, click Webhooks.
-
In the table on the right, click the webhook you want to view deliveries for.
-
Below Recent Deliveries, observe the event ID, event type, created date, and status for up to 20 of the most recent deliveries over the last week.
-
Click the event ID to view additional details, including the Event ID, Request Payload, and Response Payload (when available).
You also have the option to refresh the list of recent deliveries using the refresh icon at the top right of the table.
The possible webhook delivery statuses are:
|
Status |
Description |
||||||||||
|---|---|---|---|---|---|---|---|---|---|---|---|
|
Success |
The webhook was successfully delivered to your server. |
||||||||||
|
Pending |
The webhook is in the process of being delivered to your server. |
||||||||||
|
Failed |
The webhook failed to deliver to your server. You can resend the delivery to try again. |
||||||||||
Resend a webhook delivery
You have the option to resend webhook deliveries with the Failed or Success status. Test deliveries can’t be resent.
Resending a webhook delivery will create a new delivery record with the same event ID. After you’ve resent a delivery, you won’t be able to resend it again. However, you can resend the newly created delivery record.
-
In Users and Access, click Integrations.
-
Under Additional, click Webhooks.
-
In the table on the right, click the webhook you want to resend a delivery for.
-
Below Recent Deliveries, locate the delivery in the Failed status and click Resend.